Monthly Archives: October 2025

Speaking and Writing: Let’s Get these Personality Adjectives Moving

Gallery walks must be one of my favourite dynamics. If we add speaking and writing, we have the whole package.

This activity takes something as simple as learning personality adjectives and turns it into an engaging speaking and writing task. The goal is for my students not just to memorize words like arrogant, generous, or shy—but to use them to express opinions and challenge ideas.

So in a nutshell, these are the steps to follow.

Materials: Posters (use mine if you wish), Functional language, Blue-tack or cello-tape, Optional post-it notes

  • REVISING: We start by revising personality adjectives. It’s the vocabulary we’re working on, so students already have a clear focus.

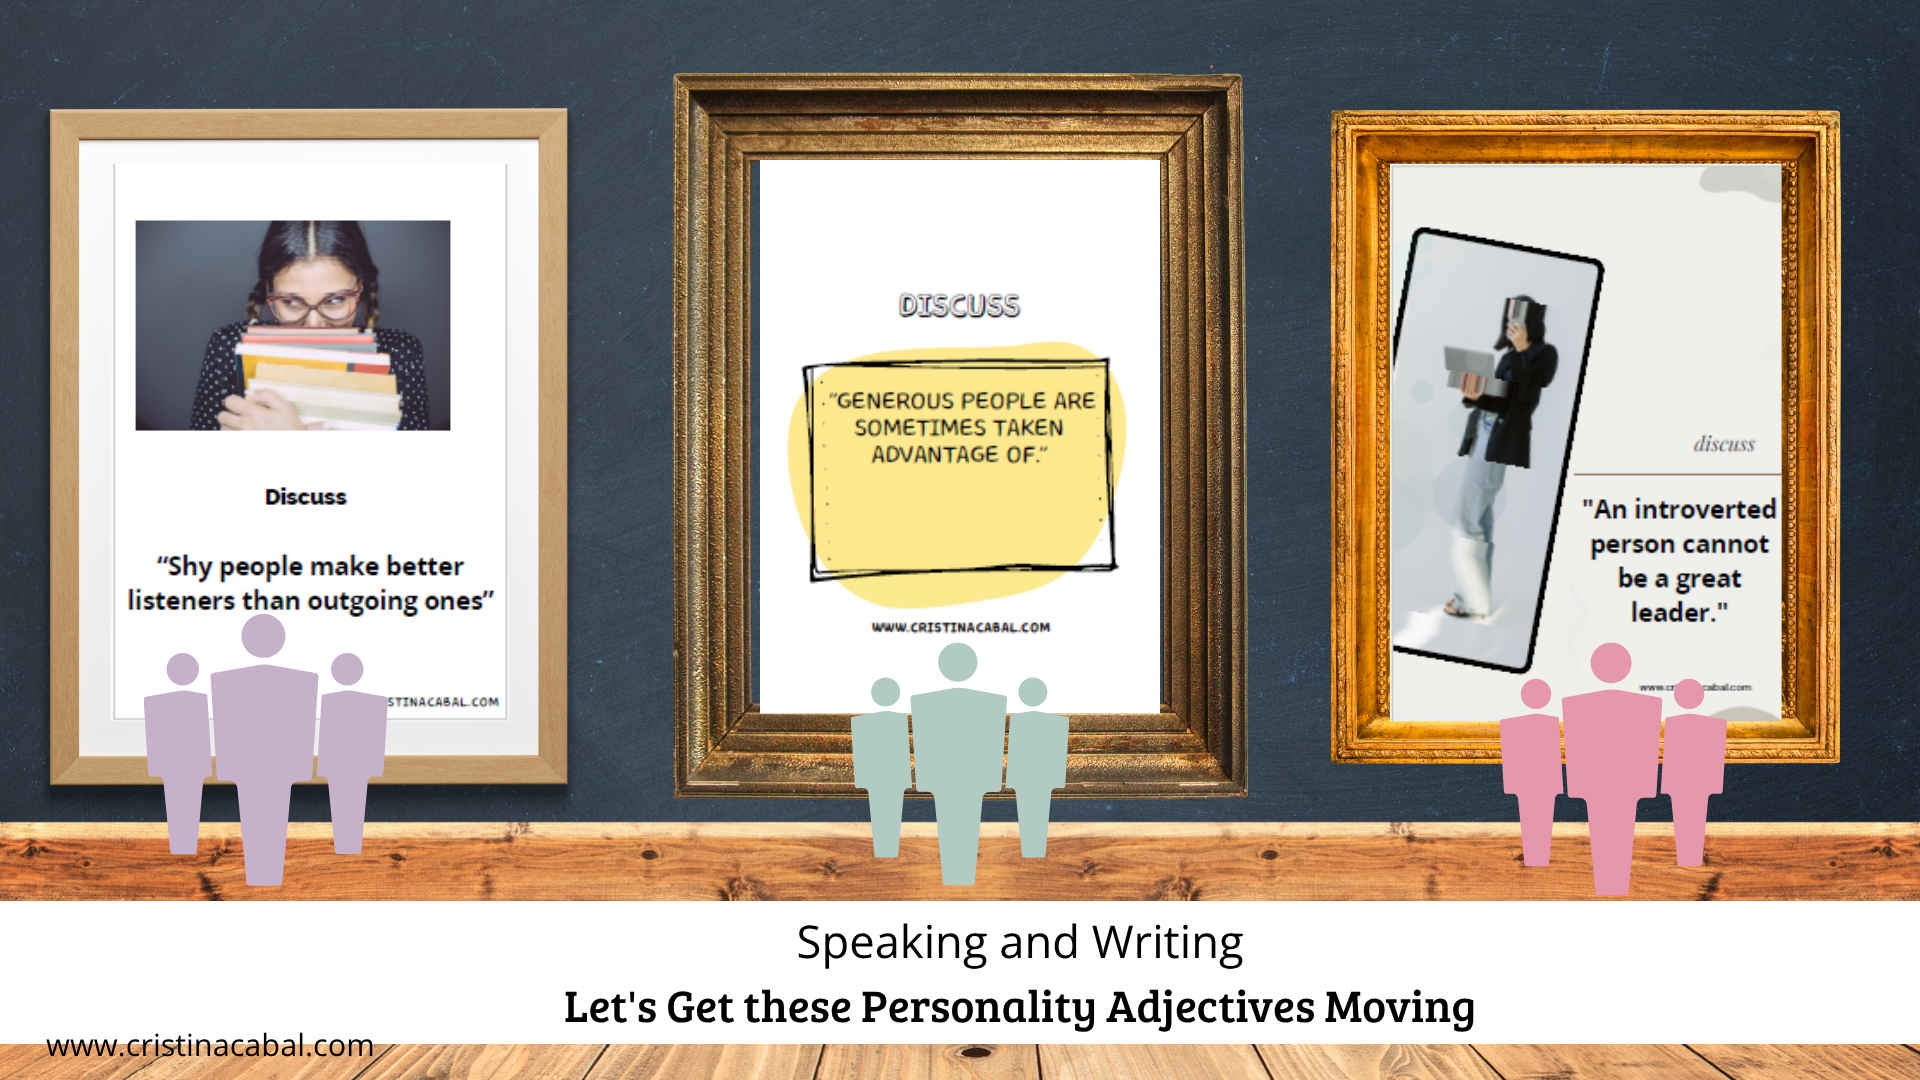
  • POSTERS. Posters with controversial statements, all using personality adjectives, are up on the walls. These are the ones I have used for this activity. You are welcome to use them.

  • Round 1. Gallery Walking. Students walk around the room in pairs or threes, reading the controversial statements and discussing whether they agree or disagree with each statement. You might want to write on the board some functional language to express opinion.(link to photocopy above)

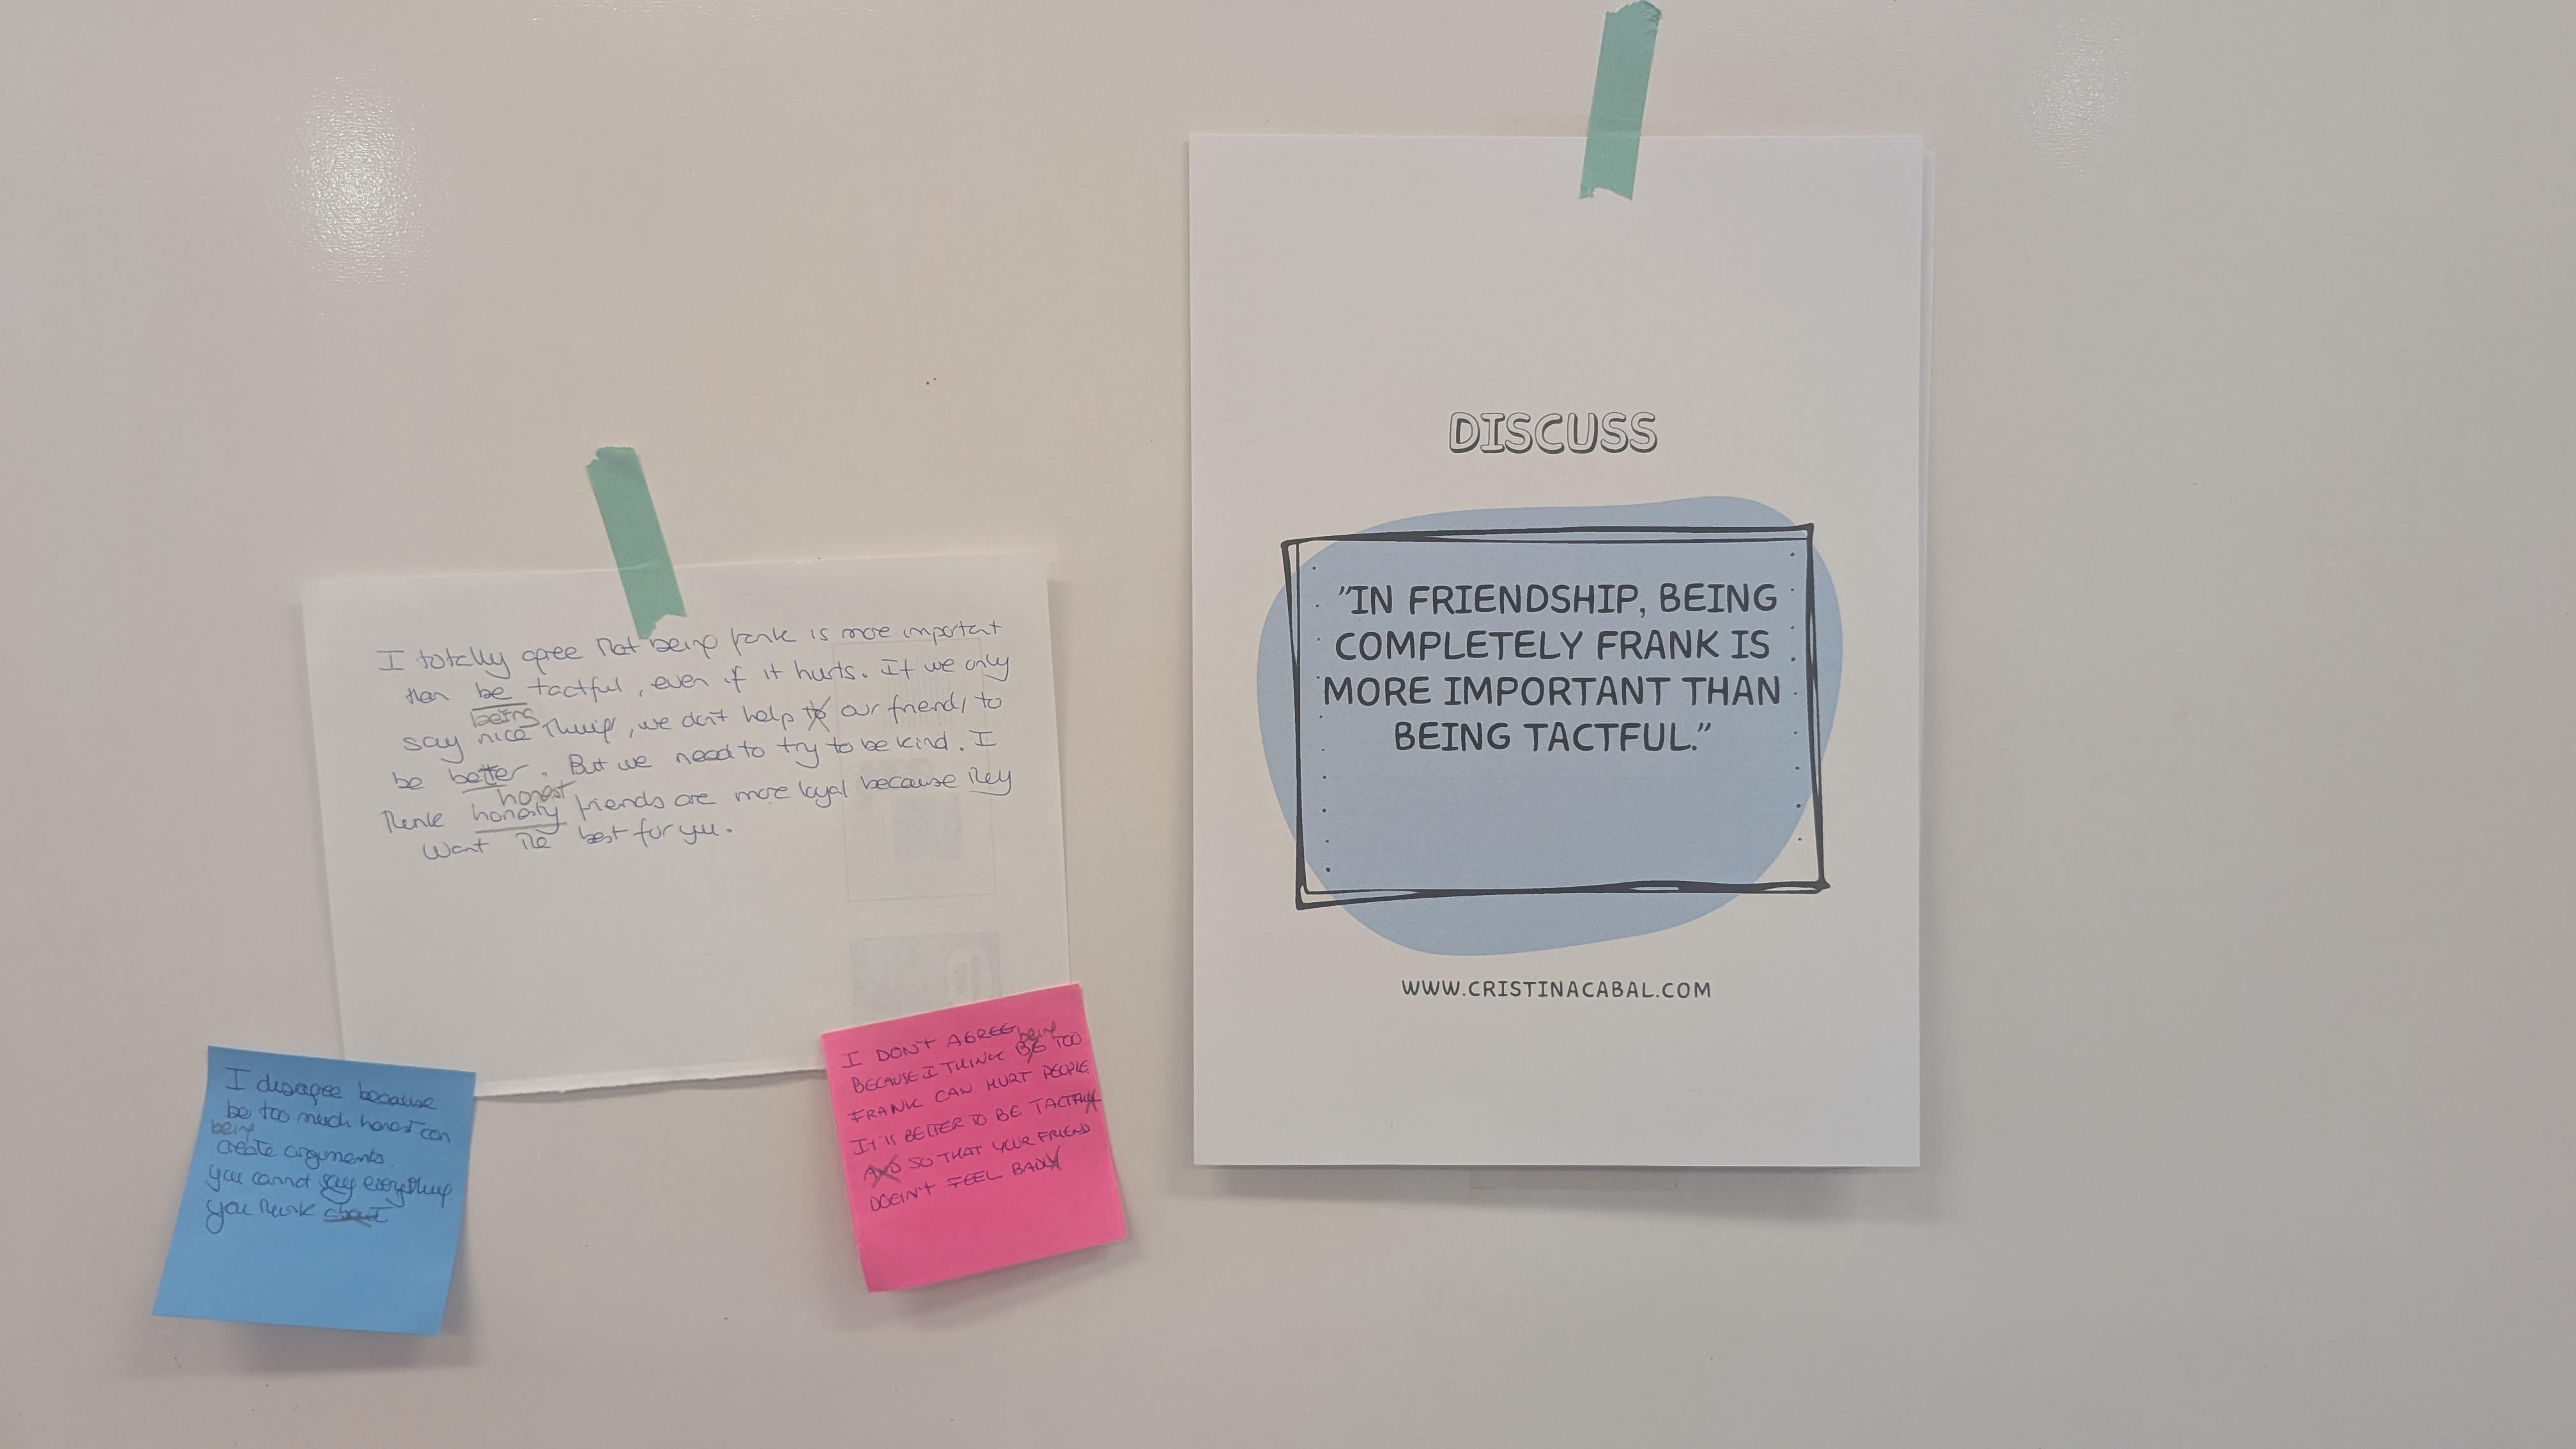
  • Round 2: Write it down. Back at their seats, each student, individually, chooses one statement they agree or disagree with and writes about 70–90 words explaining why they agree or disagree — encourage them to use personality adjectives in their writing. They then stick it next to the poster.

  • First side note: ask them to use their best handwriting. You know what I am talking about, don’t you? Sometimes reading students’ handwriting is like trying to decode ancient hieroglyphics!
  • Second side note: yes, after this first round, you should walk around reading what they have written   and correcting mistakes. I am afraid this is our job, too.

  • Round 3: Writing. React and respond. Students go around again, this time reading their classmates’ post-its. Then, they add a response—agreeing or disagreeing with their peer’s opinion, explaining why. Note: a couple of sentences would be enough this time.

Note: For Round 3, I give my students post-it notes in different colours. It never hurts to add a bit of colour to life.
When Your Students Make YOU the Star of Their Halloween Story… with a Little Help from AI!

Just imagine that you give your students a spooky Halloween writing task and you -their teacher – are the main star.  Have a look!

This is AI. Free and simple.  This little video is easy to make; Find a photo of yourself, choose a template , upload your photo and click Send. It only requires about 2 minutes, and the result is stunning. Just what we need to engage our students and make them think we are just geniuses at generating videos.

First, I will show you how to create the video clip and then, I will share how to use it in my class and with my students.

  1. Find a good photo of yourself to upload.
  2. The tool is PixVerse. It is Freemium and it gives 60 credits daily. With 60 credits, you can create two or maybe three video clips daily.
  3. Watch the video below to see how easy it is to create a video clip.Play around with other templates, it is a lot of fun.


Now, the writing task. 

Activity: What Happens Next?

This is a traditional narrative writing activity where a short, dramatic video serves as the story’s “inciting incident.” Students will watch the clip and then write the rest of the story, focusing on plot development, descriptive language, and a clear resolution.

Learning Objective. Students will practice using past tenses (Past Simple, Past Continuous), sequence connectors, and descriptive vocabulary related to action and suspense.

Lesson Procedure

Step 1: Introduction & The Prompt (5 mins)

  • Tell your students: “We are going to watch the beginning of a Halloween horror story. As you’ll see, the main character is me, your teacher. Your mission is to write the rest of the story: what happens immediately after the clip ends, and how it all concludes.”
  • Play the video for the class. Play it a second time so they can absorb the details of the scene.

Step 2: Guided Brainstorming (10 mins)

  • Before students begin writing, project or write the following prompt questions on the board. Give them a few minutes to think and jot down some ideas. This will help structure their stories.

Guiding Questions:

    1. The Immediate Action: What happens in the five seconds after the video ends? Does she fight back? Does she scream for help? Is she dragged into the dark room?
    2. The Attacker: Who is under the Ghostface mask? Is it a student playing a prank, or is it someone truly dangerous? What is their motive?
    3. The Rising Action: How does she try to escape? Does she find a weapon (a book, a heavy pen)? Does someone else enter the scene (another teacher, the school janitor)?
    4. The Resolution: How does the story end? Does she get away and call the police? Does she manage to unmask the attacker, revealing a huge surprise? Or is it a tragic ending?

Step 3: Individual Writing Task (20-25 mins)

  • Instruct students to write a short story (around 200-250 words) that continues directly from where the video clip ends.
  • Remind them to use their brainstorming ideas to build a complete narrative with a beginning (the video), a middle (their rising action), and a clear end (their resolution).

Step 4: The Horror Gallery Walk & Peer Voting

Time Allotment: 15 minutes

Once they have finished, post their stories on the classroom walls to create a “Horror Gallery.” Students will stand up and move around the room to read the different creative endings their classmates have imagined. After reading them, they will vote for the story they liked the best.

Yes, don’t ask, we will need to collect their stories and give them feedback of their mistakes.