Teaching today goes far beyond simply delivering content. It’s about connecting with students, motivating them, and creating learning experiences that genuinely spark their interest. Of course, textbooks are useful—they provide structure and consistency. But relying on them alone often makes it difficult to truly engage students, especially in a world filled with dynamic, interactive content.
That’s where AI comes in, since it allows us to adapt our teaching in ways that were unthinkable just a few years ago.

Another important aspect is keeping education aligned with the times. While a PowerPoint presentation can still do the job, varying your methods—using multimedia, storytelling, or digital tools—can dramatically boost engagement and retention.
Yes, it takes time. I won’t pretend otherwise. But here’s the good news: once you start creating your own content, it becomes not only incredibly rewarding, but also a little addictive. Seeing your students light up with curiosity and enthusiasm? That’s the real magic.
Today, I’m going to show you how to create a personalized animation using your own image as a reference—only this time, we’re turning it into a fun and expressive 3D cartoon character!
Here’s an example of what I mean:
If you listen closely to the song, you’ll actually catch the names of the AI tools I used to bring this animation to life. Cool, right? Let’s break it down, and make sure you don’t miss a thing.
Step 1: Upload Your Photo and Describe It with Gemini
First things first—upload a photo of yourself to Gemini and ask it to describe the image in detail. I used a clear photo of my face, and Gemini generated a description of my facial features that I could use as a base for the next step.
Once you have that description, here comes the creative magic! I gave Gemini the following prompt:
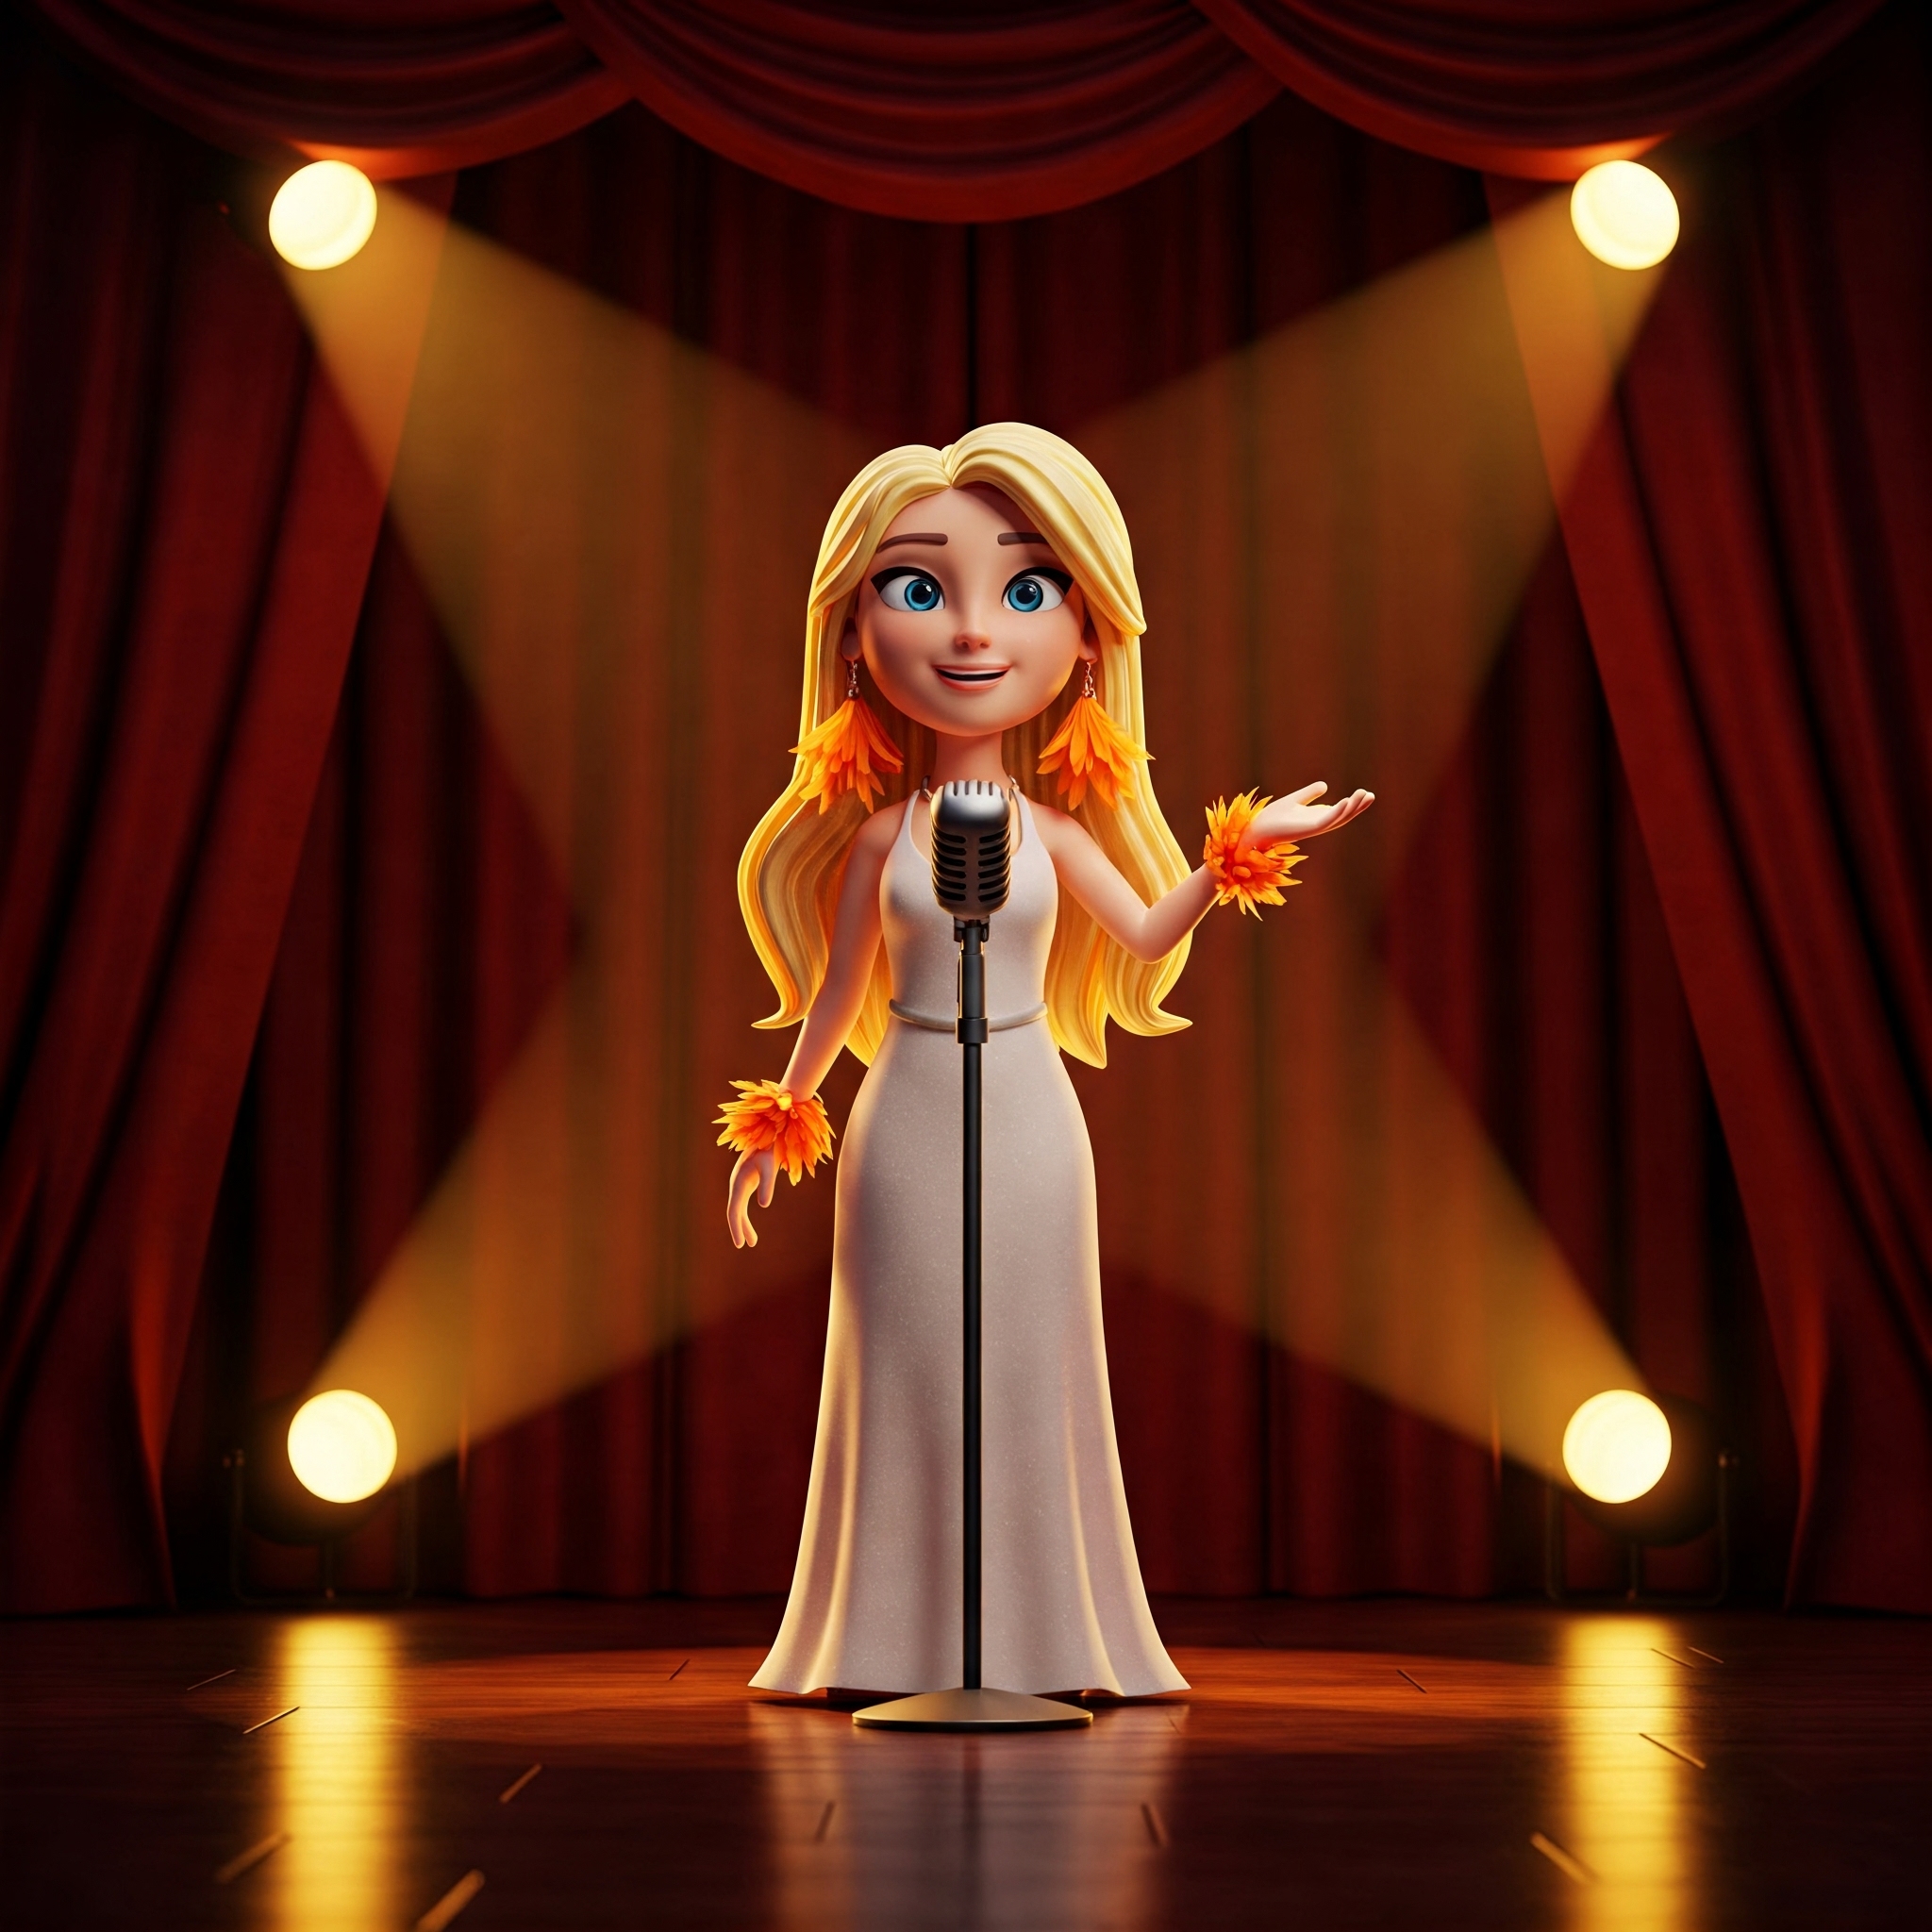
Create this image. Now turn this woman in the image into a 3D-rendered cartoon standing in front of a vintage microphone on a stage. She is wearing a beautiful long white dress and orange feather earrings. Her expression appears happy, and she has one hand gesturing outward, palm up.
The background features dark red or brown velvet curtains, softly illuminated by warm, orange spotlights on either side of the character. The floor appears to be a dark, reflective surface, suggesting a stage setting. The overall lighting creates a dramatic and somewhat intimate atmosphere, focusing attention on the central figure.
Step 2: Create Different Scenes for Your Animation
Now that you’ve got your main character and setting, it’s time to create different scenes to bring your animation to life. This is where the real storytelling begins!
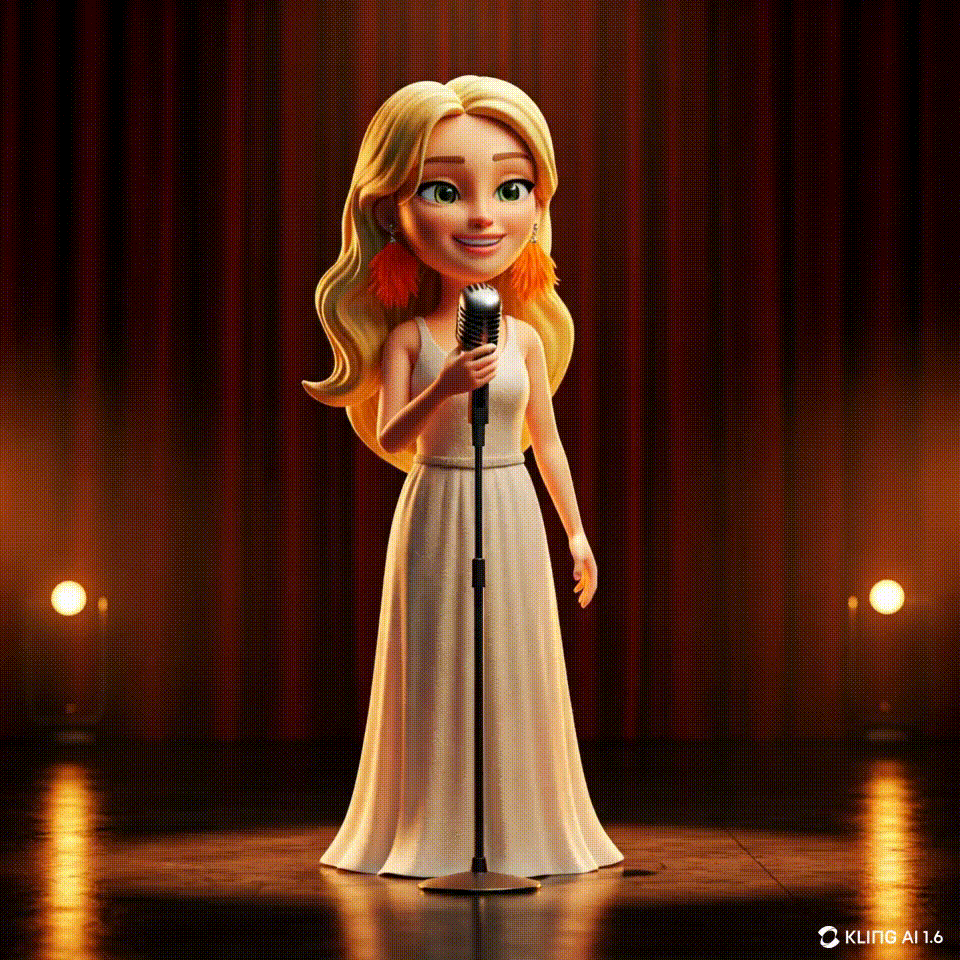
To keep consistency, I asked Gemini to recreate the same woman in the same stage setting, but with a new pose and perspective. Here’s the prompt I used next:
“Same woman, but now it’s a closer shot. Her hand is gently holding the vintage microphone, and she’s looking slightly to the side with a soft smile. Keep the background the same—velvet curtains, warm lighting, and stage setting.”
This keeps the mood and aesthetic consistent while adding variety and motion to your final animation. From here, I continued generating different versions by tweaking the prompt just a little each time—like changing her expression, pose, or camera angle:
-
“Same woman, turning slightly as if introducing a song.”
-
“Same woman, mid-laugh, hand over her heart.”
Tip: Always mention “same woman” and “same setting” in your prompts. That helps Gemini maintain visual consistency across all your scenes.
Step 3: Animate Your Image with Kling
Alright, now it’s time to bring your character to life! 💃
To animate the image, I used a free tool called Kling. It’s super easy to use and surprisingly powerful. Here’s what I did:
-
Open Kling and select the Video feature.
-
Upload the image you created earlier with Gemini.
-
In the prompt box, describe the movement or action you want your character to perform.
For example, I used this prompt:
“Singing and moving her head elegantly and slowly, as if dancing with the music.”
And just like that—Kling turned my 3D cartoon into a living, breathing (well, almost!) performer on stage.
You can repeat this step with different images or prompts to create multiple clips for your animation. The key is to keep your prompts clear and gentle to match the mood and style of your scene.
Step 4: Add a Voice or a Song (Your Choice!)
Now, what comes next really depends on what you want your animated character to do. Do you want her to sing? Speak? Narrate a story? You’ve got options!
In my case, I wanted the woman to sing, so here’s what I did:
-
I used ChatGPT to help me write original lyrics—super fun and creative!
-
Then, I took those lyrics and used Suno, an AI music generator, to turn them into a full song with vocals and background music.
But hey—maybe you’d prefer a talking character instead of a singer. Totally fine!
Alternative option:You can simply record your own voice or generate a voiceover using tools like ElevenLabs or a text-to-speech platform.
Step 5: Put It All Together in a Video Editor
Now it’s time to assemble your scenes and audio into one smooth, eye-catching animation. For this part, I used Canva—yep, the free version works great!
I uploaded each animated clip, added my audio (the song I created in Suno), and arranged everything on a timeline to build the final video. You can also add:
-
Captions or subtitles
-
Transitions between scenes
-
Background music or sound effects
-
Title screens or fun text animations
Watching your idea come to life—frame by frame—is honestly kind of addictive. And yes, it’s sure to impress and totally motivate your students! Ready to try!
