Category Archives: Create your own stuff

10 Creative Ways to Use the Wheel of Fortune to Teach English

The wheel of fortune? I know. I know. If I want you to continue reading, I’d better explain what it is. Have you ever seen the game show Wheel of Fortune? Yes, that one where you spin a wheel and get money if you successfully guess the missing letters in a word or phrase.

Good news. It can also be used to teach/learn English.

Unfortunately I am not working with primary or secondary students. I know they would love this tool. It’s a lot of fun to work with -spinning a wheel normally is, isn’t it?-, but it also has a lot of potential to teach/learn English. I teach adults and it normally takes them more time to get used to the way I teach. Sometimes, a far cry from traditional. Well, yes, I take my work very seriously but, from time to time, I like to spice up my lessons with little games and online tools to energize my lessons. This tool I’m using today is from classtools.net.

In this post, you’ll learn

  1. How to feed the wheel
  2. Ideas to use the wheel of fortune to teach/learn English


1. How to feed the wheel

  • Click here to get to the wheel
  • Click on Edit and write whatever you want to see displayed on the wheel.
  • Click on Save this list as currently shown
  • Choose a password to edit the wheel in the future
  • Make sure you make a note of the unique address of your wheel. I suggest you email yourself the link.
  • After a name or category is selected you can remove it from the wheel.

2. Ideas to use the wheel of fortune to teach/learn English

Vocabulary

  • Revising vocabulary. Very useful to revise vocabulary either as a whole class, in pairs or in competitions. Students will need to either explain the meaning of a word or use it in context. Nobody will ever accuse you of favouring a team and there are countless options when working with vocabulary. While you’re reading this article, I am sure your brain is already suggesting lots of possibilities, like irregular verbs, phrasal verbs, phonemic transcription…etc
  • Another possibility to explore would be feeding the wheel with different topics and asking students to write or say as many words related to the topic as possible in one minute. Some easy topics could be: jobs, shops, nationalities, animals, food…etc.

Speaking

  • Three minutes. Feed the wheel with different topics you want students to talk about and ask students to work in pairs and spin the wheel. They’ll have to talk about the topic for about three minutes. Great to revise for oral exams!
  • Hot seat.  Again feed the wheel with different topics you want students to talk about and divide the class into teams and ask a student from Team A to sit in the “hot seat”. Spin the wheel. Members of the other  team need to ask him questions about the selected topic; he’ll need to talk for about three minutes answering the other team’s questions but his answers cannot contain the words YES or NO.
  • Comparing. Do you want students to compare? Feed the wheel accordingly: compare living in the countryside/city, travelling  by bus/plane, working as a teacher/shop assistant…etc

Writing

  • Storytelling. Give students an inspiring story starter and feed the wheel with prompts they need to incorporate in their story. Spin the wheel and give students a minute to use the prompts in their stories. Spin the wheel as many times as you deem appropriate. Display on the walls of the class the stories for everybody to read.
  • Using connectors. Feed the wheel with different connectors (and, but  however, although,…etc). Ask students to work in pairs. On the board, write three sentences and ask students to choose one. Tell them this sentence will be the first in their stories. Spin the wheel and display the first connector they need to use.  Spin the wheel as many times as you deem appropriate. Display on the walls of the class the stories for everybody to read.
  • Dependent prepositions: feed the wheel with verbs such as depend, rely, insist…etc and ask students to write a sentence using the verb together with its dependent preposition.
  • Order of adjectives. Are you teaching the order of adjectives before the noun? Feed the wheel with nouns and ask the students to write a sentence containing the noun modified by two or three adjectives.
  • Verbs followed by infinitive/gerund. Are you teaching/learning verbs followed by infinitive or gerund? Rotate  the wheel and ask students to write a short sentence containing the verb randomly chosen.

I’m sure you have some more ideas to use this classroom tool, which is free and embeddable.  Have fun while learning, have fun while teaching.  😉

Blog de Cristina is also on facebook. Follow us!

Tips and Links to Prepare for the Oral Exam at Home

I love trying new tools and today I’m trying Wideo, which is a tool which lets you create beautiful animated video content in a very easy way. Although I’ll write about some of  its pros and cons below, the reason why I’ve chosen Wideo today is because I needed a tool that allowed me to insert interactive buttons in an easy way and Wideo is perfect for this.

So, here’s the video: Tips and Links to Prepare for the Oral Exam at Home

Play the video. It will stop where interactive buttons are provided (last two slides). Click to resume the video.

What I like about this tool:

  • it’s free, easy to use and very intuitive.
  • It provides free video hosting
  • Lots of professionally-designed templates to choose from
  • You can upload your own picture, music and background images
  • You can add interactive elements (clickable buttons and contact forms)
  • It provided a unique url and an embed code
  • You can switch from video mode to presentation mode for slide-by-slide presentation.

 What I don’t like:
    • Time limit: on a free plan, the length of the videos is restricted to 3o seconds.
    • You have to pay to download your video

Blog de Cristina is also on Facebook. Follow us!

15 Ways a Screen Recorder can Help you in your English Classes

Today I want to share with you an amazing screen recording tool Screencast-o-matic, which has a lot of potential to teach and learn English.

Hey! Wait! I know, you are not tech-savvy. You don’t need to be. Trust me. When you finish reading this post, I’m sure you will be willing to give it a go . The reasons?

  • It’s super easy to use! Do you know how to press a button? Then, you know how to use this tool.
  • You don’t even need to register.
  • It has a lot of potential to teach/learn English.

Let’s start:

What is Screen-o-matic?

Screencast-o-matic is a free (you don’t even need to register) easy-to-use screen recording. You can use your webcam or both. Screen-o-matic will capture everything on your screen and then, if you wish, share it.

How can I use it in the classroom?

As a teacher

1. For correcting your students’ written assignments. We all have been in this situation: a student is ill or away on a business trip, but he still needs to have some feedback on his written assignment. With this tool, it’s very easy to offer visual constructive feedback by giving audio and visual cues.

Have your students send you their essays by email. Record yourself correcting and explaining their mistakes. Then, send them the video. Thanks to Russell Stannard for this awesome idea. Here’s an example uploaded to screen-o-matic. Sorry, I don’t sound very energetic. It was very late and I was dead tired!

 2.  For assessing students’ speaking skill, especially when describing pictures or talking about slides. Ask them to choose one or several pictures and ask them to record themselves. Here’s an example of one of my students uploaded to youtube. Thank you Elsa! 🙂

3. For a variety of speaking activities:

  • To explain a recipe
  • To talk about your favourite group, hobby, family…etc
  • To describe, for example,  traditional games, unusual customs…etc.
  • For first-day presentations
  • For book/film reviews

The only limit is your imagination.

4. For recorded contests:

  • It’s St Valentine’s day, ask them to invent a romantic story
  • It’s Halloween, time for a horror story!
  • Give them a set of pictures and ask them to create a story
  • Give them some words and expressions and ask them to create a story
  • For recorded minisagas (maximum of 50 words)

5. For asessing students’ reading fluency and pronunciation. Ask students to read a given text online and ask them to send their recording.

6. For flipping your classroom. Not every student learns in the same way so it would be a good idea to record some of the most difficult grammar points for weak students to revise at home.

7.  Doing exams at home. You can even make things easier for students who, for personal reasons, cannot sit exams in the classroom. Send them the test and ask them to record themselves answering the questions either in written or oral form. It might be a good idea to give them a time limit to send back the video with the answers. You can ask them to use the webcam, too (for obvious reasons).

8.  To make tutorial videos to explain a task they need to do online or how an online tool works, for example this one. The yellow pointer makes it easy for students to follow your explanations. Example here

9. Help your substitute teacher. You can even make a video to help your substitute teacher if you’re going to miss class.

As a student

10. Using your webcam, for collaborative projects.

11. As an alternative to a Power Point presentation individually or in groups.

12. To do any oral assignment with one or several slides.

13. To state your opinion on any given topic.

14. To record yourself when practising for oral tests.

Why do I like it?

  • You don’t have to register or give your email address unless you want to upload it to their server.
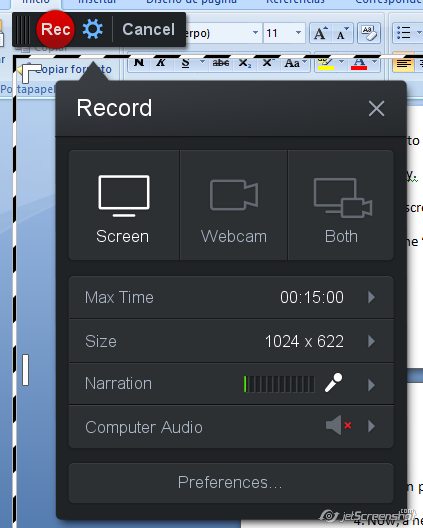
  • You can record up to 15 minutes
  • You can create different folders for your different classes. If you create an account and share the email address and password with your students they can upload their own assignments and have everything neatly organised in folders.
  • You can choose to record only your computer screen, you can use your webcam or both
  • You can resize your recording window.
  • You can choose the microphone you want to use and adjust the volume. For laptops you can use the built-in microphone.

Is it easy to use? Very easy.

  • Go to screen-o-matic .
  • The first time you use it, you’ll need to download a small program.
  • Click the “Start Recording” button and the recording button will be launched.

  • Click the red button Rec and everything inside the frame will be recorded.
  • You can pause or restart or click Done when you finish.
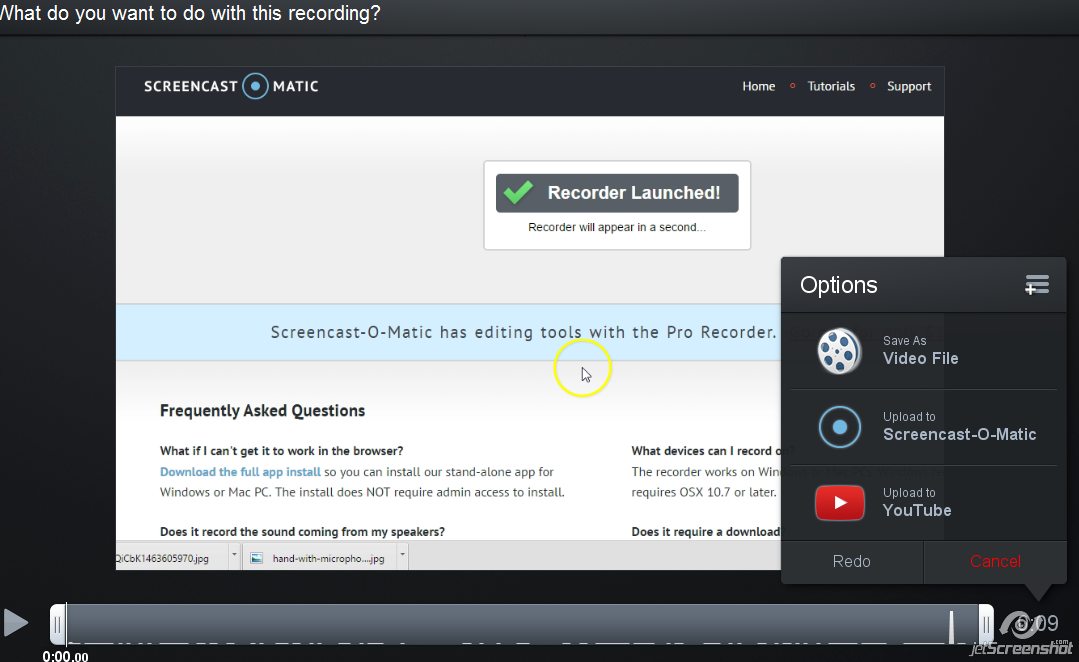
  • Now, a new window will open offering you the possibilities of downloading your video, or uploading it to youtube or to Screen-o-matic.com (to use this last option you will need to register). Uploading to Screen-o-matic.com is free and it has some advantages:

  1. It gives you a unique url or an embed code to use on your website or blog
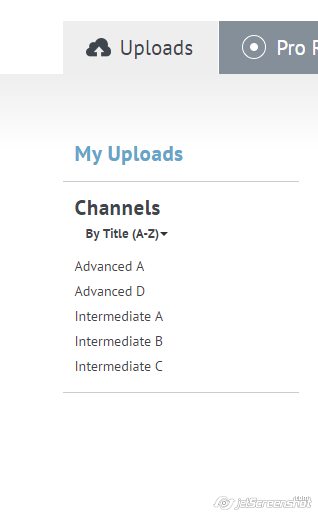
  2.  You can create different channels and upload your recordings in an organised way. This is particularly interesting if you want to create a channel for your students to upload their recordings.

There is an online version, which works pretty well with Windows but not so well with Mac, and a downloadable version which works with both PC and Mac.There is a free and a pro version, but I should say that the free version works just fine.

Thanks for reading!

Blog de Cristina is also on facebook. Follow us!

Four Excellent Sites for Online Dictations

Oh boy. Does it bring back memories!
Dictations! To be completely honest with you, I have mixed feelings as regards dictations. I remember back in primary school when the language teacher gave us lots of dictations like a well-deserved break after a tough grammar lesson; and then, this feeling of “I don’t want to ever hear the word dictation again” that I got from my classes at university where the teacher gave us one-page-long dictations so quickly that when he finished, he was panting for breath, and we were seeing red.

Although doing dictations is somewhat regarded as an old-fashioned technique, it is undeniable that a lot of benefits can be derived from doing this exercise. In fact, it is an integrative activity requiring the use of various skills like listening, writing and reading -when you read the passage you have written, looking for grammar or spelling mistakes. You might even add speaking if the dictation is used as a prompt to encourage discussion of the passage.

In case you are not fully convinced that dictations also have their place in the twenty-first century classroom, here are some more benefits you might want to consider:
• It improves spelling.
• It improves recognition of grammatically correct sentences.
• It helps students distinguish sounds in continuous speech.
• It improves students’ awareness of punctuation.
• It gives students practice in comprehending and helps them gain fluency in writing.

If I have managed to convince you, here are some links to online dictations you might want to try or if you are a teacher, heartily recommend to your students.

Dictations Online. (not working anymore)

This site specializes in dictations and although it is free, you can sign in to do more dictations or keep track of your score and view your score history. They are graded from elementary to advanced.

The students hear the dictation four times

  • The first time, the whole passage is read at normal speed to listen for gist.
  • The second time, each phrase is read slowly twice, with punctuation.
  • Then the whole passage is read again to check your work.
  • And finally, the written text is shown for you to see your mistakes.

Englishclub.

I like the site. It is very user-friendly. The dictations are graded going from Elementary, with short recordings of one or two phrases, to Advanced with recordings of one or two paragraphs.

Learn English free

This site features two levels: elementary and intermediate. It has a very clean interface where you’ll see two recording of the same dictation. One recorded at a normal speed and the other one at a slow speed with pauses to give you time to write down what you hear. You only need to follow the instructions.

ESL: English as a Second Language

Aimed at Intermediate and Upper-intermediate students, this site offers an amazing numbers of dictations

Do you like these sites or would you rather create your own dictations? Here are two online free tools to convert text to speech.

VOKI

SLIDETALK

Blog de Cristina is also on facebook. Follow us!
Two Handy Tools that Save the Day

There are about 10 ideas for posts on my to-write list, but this is definitely a post I have meaning to write for a long time and that for some reason or another I never got around to writing it.

This post is not about English; it has nothing to do with vocabulary or grammar. It is just a post featuring two tools that might come in handy.

♥ KeepVid  might prevent you from having a nervous breakdown when after spending Sunday afternoon preparing activities with content from You Tube or any other video site for the coming week, you find that Internet is not working. Sounds familiar? Of course, as well-seasoned teachers we can always resort to plan B  or plan C, but isn’t it terribly frustrating?

Keep Vid is a handy tool for downloading video. As they advertise on their site:

Keep Video Downloader is a free web application that allows you to download videos from sites like YouTube, Facebook, Twitch.Tv, Vimeo, Dailymotion and many more. All you need is the URL of the page that has the video you want to download. Enter it in the textbox and simply click ‘Download’. KeepVid will then fetch download links in all possible formats that the particular site provides.

Remember that if you want to download videos from Facebook, you will need the url. You can get it by right-clicking on the video to get its hidden url.

Downsub.As for the second useful tool, how handy could it be to have a tool that downloads subtitles from YouTube? Very!

Well, this is what http://downsub.com/ does for you. The only thing you need to do is enter the url and choose the language.

Hope this blog post has been helpful! Keep posted!