Category Archives: Writing skill

Some Activities to Teach Gerunds and Infinitives

I always claim that English grammar is easy, especially when compared to the Spanish or French grammar, but it gets a bit messy when it comes to verbs followed by infinitive or gerund.

The easy thing to say is that

  • some verbs are followed by infinitive (promise to go)
  •  some verbs are followed by gerund (can’t stand ironing).

But then we find that,

  • some other verbs are followed by infinitive or gerund with no change of meaning (start to study/start studying)
  • while some others are followed by infinitive and gerund with a change of meaning (stop to smoke/stop smoking)

And to add insult to injury,

  • some verbs are followed by infinitive with to (offer to help)
  • some others by infinitive without to ( make me study)
  • some verbs are followed by gerund, but if there is an object pronoun in between the verb and the gerund, then the gerund becomes infinitive (recommended reading / recommended her to read) …

Amazing, isn’t it?

Well, I suppose there’s nothing we can do about it, so let’s get down to some serious studying.


  • Level: Intermediate
  • Time: 60 minutes

THE GRAMMAR.

Download the document here


      THE PRACTICE:

Exercise 1. The Quiz


Exercise 2: The Rewriting Exercise


3.  Speaking and/or Writing: Storytelling Competition


  • Go to wheeldecide.com. Ask students to tell you verbs followed by gerund first, and then verbs followed by the “to” infinitive. Feed the wheel with these verbs.
  • Explain that in this activity they will need to seat in a circle in groups of 4.
  • Explain that you will write on the board the beginning of a story and then, in their groups, they will need to continue it.
  • Write on the board the beginning of a story. You can use this Short Story Generator.
  • Spin the wheel.
  • To make sure students will use the verb in the correct way, ask them to tell you whether the verb displayed in the wheel is followed by infinitive or gerund.
  • The oldest person in the group will start telling the story using the target verb in the wheel.
  • Give the student one minute to continue the story and then spin the wheel again for the next student.
  • If a student cannot come up with an idea to continue the story, he’s eliminated.
  • Continue until there is only one student left. This student will be the winner if he manages to give the story in his group a suitable ending.

Here’s the wheel I have used with my students.

Join us on Facebook

Integrating Technology for Active Learning: An Activity Using Google Slides and Padlet.

There is no denying I use a lot of technology in my classes. It gives me great pleasure to discover a new tool and design an activity around it. I really think this is what keeps me motivated after so many years teaching. The challenge that mastering a tool brings and the possibility to use it in my classes to boost students’ motivation and spark their interest is certainly something that keeps my own motivation alive and kicking

Today, I would like to share with you an activity that I did with my intermediate students. I loved designing the activity and the way my students got involved activating their communicative and writing skills during the whole process.

Tools used:

Aims:

  • to develop students’ communicative skills
  • to develop students’ writing skills
  • to revise vocabulary related to “work”
  • to integrate technology in the classroom
  • to encourage collaborative work

Before the class.

I created a Google presentation using Google Slides and wrote the content for the first two slides. I also added three extra blank slides (see below)

I created three Padlets and called them: Work 1, Work 2, and Work 3

In each of these 3 blank slides I inserted a link to one of these Padlets.


During the class.

 One. I asked students to form groups of 4. I have 12 students in this class, so I had three groups, one for each blank slide. If you have more students, you can easily add another slide to accommodate two more questions. I asked each group to write three or four questions related to “work”. I certainly encouraged them to come up with some juicy questions and avoid simple ones such as “Where do you work?”

Two. Once they have written their questions, the groups read them aloud and the class decides on the best two from each group to keep.

Three. At this point, there are two things you can do

  1. Assign each group one of the three slides and ask them to write their two questions, being careful not to delete the link to Padlet. Share the link for your Google Drive presentation making sure you share the link with editing permissions (read and write).  I have shortened the link using Google shortener.
  1. If you think this step might be complicated for your students, you can always write them yourself. Have the groups dictate their two questions and move on to the next stage.

Four: Speaking. Ask students in their groups to discuss the questions in the three slides encouraging them to use work-related vocabulary. Get feedback.

Five: Set homework.

Show the presentation from the very beginning where they will see the instructions for their homework.

Explain that at home they will need to answer one of the two questions in each slide. They can do it by writing their answers or by recording them.

Remind them it is the same shortened link you shared with them in Three.

See one of the Padlet below


Hecho con Padlet

A Project-Based Learning Activity: Unusual Traditions

These past few days have been hectic with lots of exams to be written and then marked, plus all that red tape I can’t stand involving end-of-term exams. To top it all, my old friend the flu decided to pay me a visit. Very timely.  Right now, thank goodness, deadlines have been met and everybody seems to be winding down for the holiday season. Me, too. So, that’s probably going to be the last blog post of the year.


  • Organisation: Group work
  • Level: B2 and upwards
  • Materials: tackk tutorial here (optional)
  • Aims: to encourage collaborative work by giving students the challenge of researching, selecting and presenting a project about unusual traditions around the world.
  • Online tools: Padlet and Tackk

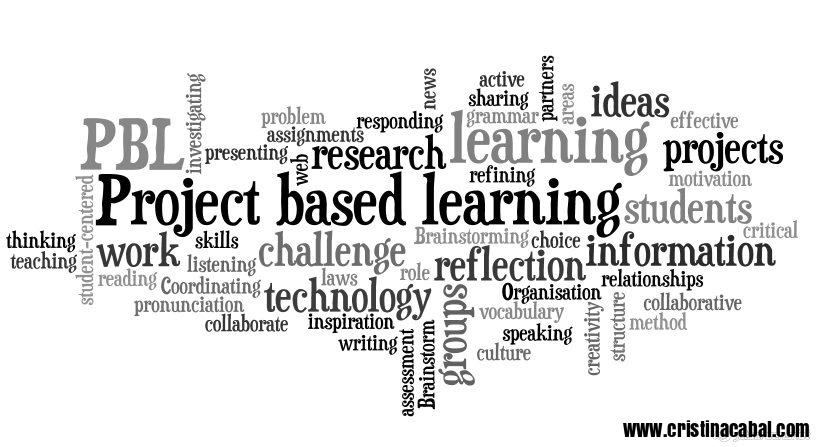
Project Based Learning- What is it?

It is a student –centred teaching method in which students acquire knowledge and skills by investigating and responding to a complex question, problem or challenge.

PBL is an active learning style which inspires and motivates students because they take an active role in their learning process and experience success in their own learning. The role of the teacher here is of mere facilitator and coach.

In PBL students are encouraged to work in pairs or in groups, which is also good because it creates a friendly atmosphere which is a boost to their motivation and creativity.


Project-based learning structure

  1. Choosing the problem or challenge
  2. Organisation
  3. Brainstorming
  4. Coordinating
  5. Sharing learning and refining
  6. Presenting and sharing

1.Choosing the problem or challenge.

For this project, students will be rising to the challenge of presenting information about unusual customs in the world.

2. Organisation.

My classes are quite large so students will work in groups of 4 or 5.

On the board the class as a whole decide on 4 or 5 areas, they want to talk about. There should be the same number of areas as groups you have. Each of these areas is assigned to a group to research.

In this project

  • Relationships
  • Festivals
  • Law
  • House and Home
3. Brainstorming

This step is done entirely at home with the help of an online collaborative free tool. My students are adults, some as old as 70,  and they only see each other in class  twice a week, so it was important to provide them with some kind of free online tool  they could use to brainstorm ideas, share them with the members of the group and organize their project (timing, visuals, specific assignments..etc). I used a Padlet, a well-known collaborative tool, which is very easy to use, something really important as some adults are reluctant to use new technologies. Each group was assigned a different Padlet and given a week to do research on the internet and post on Padlet their ideas.

Below is the Padlet the group”House and Home” used.

Hecho con Padlet


4. Coordinating.

This stage might take the first or last 10 minutes of your lesson. Once they have shared their ideas on Padlet, in class they decide on the number of traditions they are going to present, who is going to do what, the order in which they are going to present the information and the visuals or videos they are going to use.

5. Sharing learning and refining

In the next class, allow students time to get together in their groups and share their drafts. Offer help and guidance but ask students to help each other by swapping their drafts within their group  to improve and proofread their written work.

6. Presenting and sharing

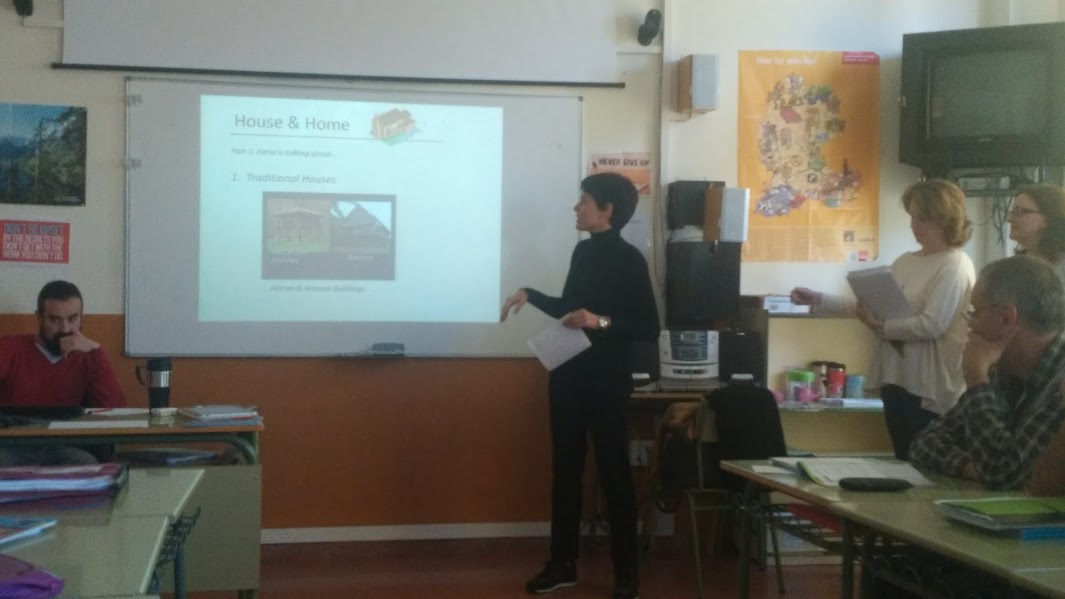
Agree with the students on the order of the groups and let the show begin. Below is a picture of one of the groups on stage.

Sharing it with the world is also important. Here’s how we did it. Again, we used a free online digital tool called Tackk.com, which allows  you to beautifully showcase your projects. I gave my students this simple tutorial to help them get familiar with the tool.

Here’s the tackk my students have created.


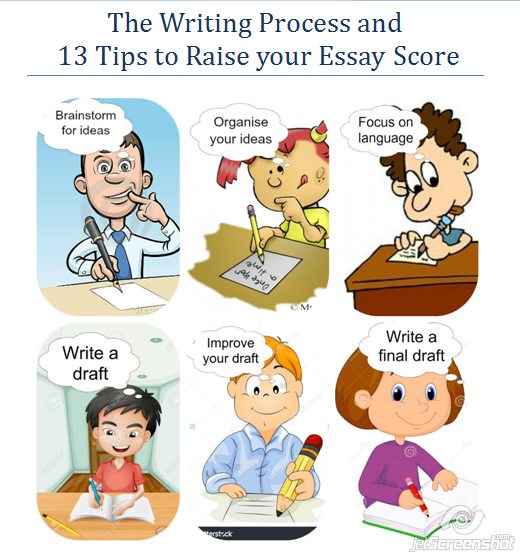
The Writing Process and 13 Tips to Raise your Essay Score

Writing is a process. For some students it might seem like a daunting task, but if you look at it as a succession of small steps to follow instead of looking at it as the big final product, writing can be fun and easy.

Useful Links:


Part 1. The Writing Process


Brainstorm for ideas

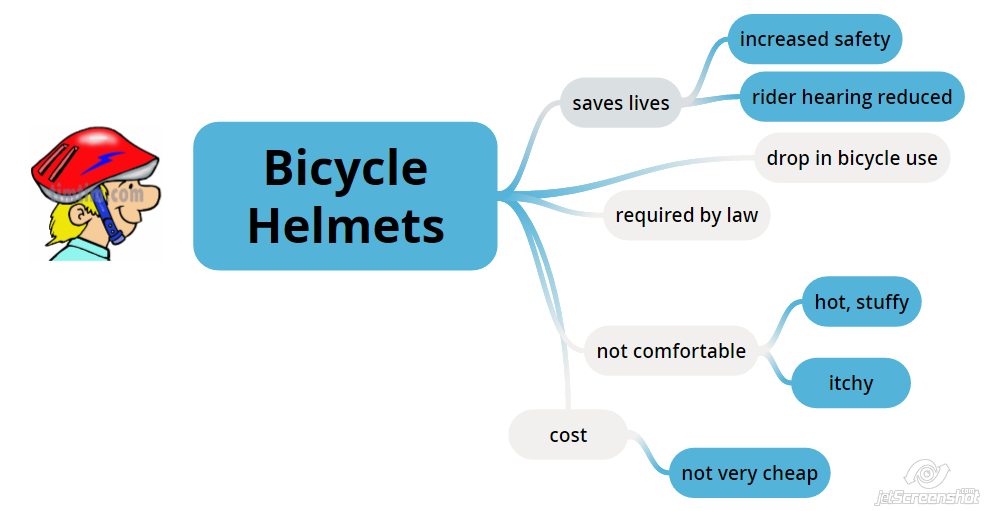
  • Write down all the ideas you can think of. You can try mind mapping your ideas. It is a good technique to generate ideas and expand on them. You can begin by writing a big bubble in the middle of the page with the topic and then use arrows to draw new bubbles with ideas and again arrows with more specific points or observations about this idea.
  • At this stage, don’t worry about spelling or grammar mistakes.

Organise your ideas

  • Decide which ideas to keep.
  • Group similar ideas together.
  • Organise your ideas according to the writing task.

Focus on language 

  • Think of words and expressions you will need in your work.

Write a draft

  • Write quickly. Don’t worry about things such as accuracy or neatness.
  • Use a pencil so that it is easier to make corrections and erase things.
  • If you are writing your draft by hand, leave a wide margin for notes and space between the lines for additions and corrections.
  • If you can’t think of a word in English, write it in your own language. You can look it up in a dictionary later.
  • If you don’t know the spelling of a word, write it anyway you can. You can look it up in a dictionary later.

Improve your draft

  • Do it slowly and conscientiously.
  • Check spellings in the dictionary and look up any word you felt unsure of. Here’s a very useful post Six Amazing Websites that Make your Writing Stronger.
  • Use a checklist to improve your work. See the one my students use here.
  • Read your draft aloud. Circle the things that need to be improved, reworded or clarified.
  • Take a break from writing and reread your draft after 30 minutes. Does everything sound right?

Write a final draft

  • Copy your corrected work neatly on a clean sheet of paper.
  • Make sure your paragraphs are clearly indicated.

Adapted from Burlington Books


 Part 2. Writing an Essay


An essay consists of several paragraphs about a topic. Although there are many different kinds of essays, they all have the same basic structure.

Opening

It is the general presentation of the topic. Try to get the reader interested in your essay. How can you do that? For example, by beginning

  • With a surprising fact.

Humans usually imitate the speech of someone with a strong accent due to empathy and to create a bond and assimilate with them.

  • With a short anecdote.

If you could interview anybody in the world, who would you choose?” asked the teacher. “Nelson Mandela”, I replied.

  • With a question.

Did you know that there is an island in Japan that has more than 450 people living above the age of 100?

 The Body.

The body can have one or more paragraphs which develop the topic. The first paragraph should contain the strongest argument or example. The second paragraph the second strongest argument and the third the weakest.

A paragraph consists of several sentences about a certain topic. It has the following parts:

  • A topic sentence, i.e. an idea.
  • One or several supporting sentences to expand on the idea.
  • A concluding sentence.

The parts should flow logically and the ideas should be easy to understand.

  • Go from general to specific. Give a general idea and then expand it.
  • Avoid unnecessary repetition by using pronouns to refer back to nouns already mentioned.
  • Use connector to join sentences and show the connection between ideas.

 The Closing

It is the paragraph that summarizes the main idea or presents a conclusion, depending on the kind of essay you need to write. Some things to bear in mind:

  • It should not bring new ideas.
  • It shouldn’t be very long.
  • It can be similar to the opening, but presented in different words.


13 Tips to Raise your Essay Score


  1. Read the assignment thoroughly, several times if necessary and underline anything relevant. Sometimes there is a question or several. Make sure you cover all of them. Focus on the purpose of the composition, on the tone and the style required and also on the length requirements.
  1. Plan your writing. You need to dedicate several minutes to planning what you are going to say and how you are going to say. It makes a big difference.
  1. Write a first draft. Use pencil, if possible, to erase or correct errors.
  1. Begin each paragraph with a topic sentence and then write some supporting sentences about this topic sentence. 1 idea= 1 paragraph.
  1. Use a variety of vocabulary and grammar structures. Avoid repeating the same words over and over again. Use synonyms or paraphrase. A thesaurus or a lexicon is useful as a source of alternative words. Use a range of grammar, sentence structure should be varied and clear.
  1. Use connectors to join ideas. They also play an important part in stringing together sentences and paragraphs.
  1. Time management. Organize the time you are given to write the essay. If you have one hour to complete the task, dedicate 10 minutes to planning and organizing your ideas and allow about 10 minutes at the end to proofread your essay before giving it to the teacher. You will still have 40 minutes left to write and develop your ideas.
  1. Keep to the topic. Don’t write about things that have nothing to do with the assignment.
  1. Sound natural. Just because you know lots of connectors, it doesn’t mean you have to use all of them.
  1. Punctuation. Pay attention to punctuation, especially to the correct use of commas and periods. Your text can be confusing if you don’t use them adequately.
  1. Style. Think about the purpose of the assignment and the audience it addresses and use the correct style and tone. If it’s informal, you can use colloquial language, simple and shorter sentences, contractions, abbreviations and emotional language. On the contrary if it’s a formal assignment, you will need to use more complex sentences, avoid contractions and abbreviations and you should definitely avoid emotional language or colloquial expressions.
  1. Proofread your essay. Have a coffee or go for a walk. Come back, take your essay and reread it aloud. Does it sound “right”? Then, it’s ready!
  1. Read a lot and try to write about anything for 30 minutes every day. You’ll soon get better.

Thanks for reading!

Blog de Cristina is also on Facebook. Follow us

10 Creative Ways to Use the Wheel of Fortune to Teach English

The wheel of fortune? I know. I know. If I want you to continue reading, I’d better explain what it is. Have you ever seen the game show Wheel of Fortune? Yes, that one where you spin a wheel and get money if you successfully guess the missing letters in a word or phrase.

Good news. It can also be used to teach/learn English.

Unfortunately I am not working with primary or secondary students. I know they would love this tool. It’s a lot of fun to work with -spinning a wheel normally is, isn’t it?-, but it also has a lot of potential to teach/learn English. I teach adults and it normally takes them more time to get used to the way I teach. Sometimes, a far cry from traditional. Well, yes, I take my work very seriously but, from time to time, I like to spice up my lessons with little games and online tools to energize my lessons. This tool I’m using today is from classtools.net.

In this post, you’ll learn

  1. How to feed the wheel
  2. Ideas to use the wheel of fortune to teach/learn English


1. How to feed the wheel

  • Click here to get to the wheel
  • Click on Edit and write whatever you want to see displayed on the wheel.
  • Click on Save this list as currently shown
  • Choose a password to edit the wheel in the future
  • Make sure you make a note of the unique address of your wheel. I suggest you email yourself the link.
  • After a name or category is selected you can remove it from the wheel.

2. Ideas to use the wheel of fortune to teach/learn English

Vocabulary

  • Revising vocabulary. Very useful to revise vocabulary either as a whole class, in pairs or in competitions. Students will need to either explain the meaning of a word or use it in context. Nobody will ever accuse you of favouring a team and there are countless options when working with vocabulary. While you’re reading this article, I am sure your brain is already suggesting lots of possibilities, like irregular verbs, phrasal verbs, phonemic transcription…etc
  • Another possibility to explore would be feeding the wheel with different topics and asking students to write or say as many words related to the topic as possible in one minute. Some easy topics could be: jobs, shops, nationalities, animals, food…etc.

Speaking

  • Three minutes. Feed the wheel with different topics you want students to talk about and ask students to work in pairs and spin the wheel. They’ll have to talk about the topic for about three minutes. Great to revise for oral exams!
  • Hot seat.  Again feed the wheel with different topics you want students to talk about and divide the class into teams and ask a student from Team A to sit in the “hot seat”. Spin the wheel. Members of the other  team need to ask him questions about the selected topic; he’ll need to talk for about three minutes answering the other team’s questions but his answers cannot contain the words YES or NO.
  • Comparing. Do you want students to compare? Feed the wheel accordingly: compare living in the countryside/city, travelling  by bus/plane, working as a teacher/shop assistant…etc

Writing

  • Storytelling. Give students an inspiring story starter and feed the wheel with prompts they need to incorporate in their story. Spin the wheel and give students a minute to use the prompts in their stories. Spin the wheel as many times as you deem appropriate. Display on the walls of the class the stories for everybody to read.
  • Using connectors. Feed the wheel with different connectors (and, but  however, although,…etc). Ask students to work in pairs. On the board, write three sentences and ask students to choose one. Tell them this sentence will be the first in their stories. Spin the wheel and display the first connector they need to use.  Spin the wheel as many times as you deem appropriate. Display on the walls of the class the stories for everybody to read.
  • Dependent prepositions: feed the wheel with verbs such as depend, rely, insist…etc and ask students to write a sentence using the verb together with its dependent preposition.
  • Order of adjectives. Are you teaching the order of adjectives before the noun? Feed the wheel with nouns and ask the students to write a sentence containing the noun modified by two or three adjectives.
  • Verbs followed by infinitive/gerund. Are you teaching/learning verbs followed by infinitive or gerund? Rotate  the wheel and ask students to write a short sentence containing the verb randomly chosen.

I’m sure you have some more ideas to use this classroom tool, which is free and embeddable.  Have fun while learning, have fun while teaching.  😉

Blog de Cristina is also on facebook. Follow us!