Tag Archives: collaborative tool

Teaching Both, Neither and Either with List.ly

Several times I have been on the verge of almost writing a post exclusively to share with you this beautiful presentation tool without any reference whatsoever to English teaching.

But I didn’t. I don’t know why, but I’m glad I didn’t.

Normally posts about tools and apps you can use in the classroom go unnoticed, unless you’re clearly into incorporating technology into your classes.

So, next week I’ll be teaching the grammar for both, neither and either and I thought it would be nice to use this tool to present and teach these pronouns as, among other things, List.ly helps you build beautiful presentations, add text and links.

Now, if you’re not interested in incorporating List.ly into your classes, you can skip all about List.ly below and go straight for the grammar. 🙂 although I hope you don’t.


About List.ly


What is List.ly?

Basically it’s a tool for creating and curating lists. With List.ly you can

  • Curate content
  • Create original post content
  • Get feedback from your students

Other features

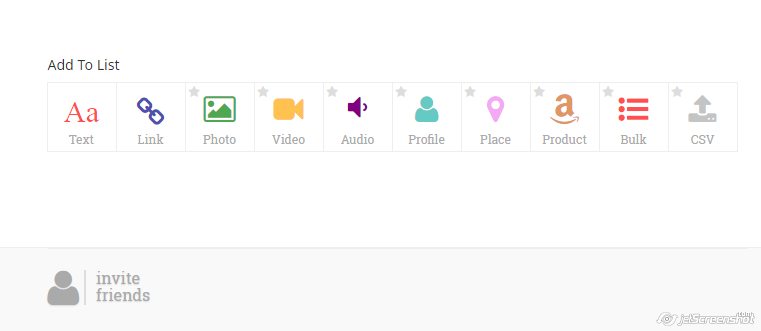
  • You can add items with or without links, photos, text, video, audio…etc
  • Also, it’s a highly collaborative tool. Students can participate:

-by voting individual lists items up or down

-by adding to the lists

-by writing comments

  • It’s free ( you can create 3 free lists) and you can easily share it and embed it on your blog.
  • You can choose from 6 formats: list, gallery, magazine, slideshow, minimal and badge.
  • You can make it private. You can obtain the link and share it privately.
  • You can moderate the list to approve any comments or contributions to the list.
  • You can decide the order in your list: curated order (great for collaborative storytelling), crowdrank (great for voting), alphabetical or newest.
  • Below you can see some of the things you can add to your list

 Tutorial: here

   How can I use it in the classroom?

Given that you can allow students to collaborate, there are endless possibilities. To mention just a few:

  • Create a list of tips. For example: for scoring high in the oral exam and have students vote the most helpful.
  • Choose a topic, for ex. stereotypes and let students add their own ideas to the list.
  • Create a list linking to specific content they need to see or study: videos, grammar exercises, topic-related lessons, …etc.
  • As you can also upload audio, give them a topic for discussion and ask them to add to the discussion by uploading a recording with their own view on the issue.
  • Create beautiful presentations with links to extra content.
  • Writing contest: share their writing and ask students to vote on the best.
  • Start a list with the songs they would like to work with, ask them to add their favourites and then vote on the best.
  • Collaborative Speaking activity: brainstorming of ideas.

Any other ideas?


 Using BOTH, NEITHER AND EITHER


  1. Traditional? Pdf with exercises here. 
  2.   A bit less traditional? Down here!

I have embedded the presentation using two formats:

  • slideshow format
  •  List format

Collaborative Writing Activity: Writing an Article

Do we really dedicate enough time to writing activities? Or is it something we keep putting off because it consumes precious time we feel we can’t afford to lose?

Most of my students think that writing is boring. I haven’t asked them. But do I need to?

Let’s face it! It can be boring. Ok. I might agree.  But most of my students, at the end of the course,  will have to sit external exams containing writing tasks. So yes, writing might be boring, but necessary.

Lately, I have been designing activities to make my students change their minds about the whole process of writing . My far-fetched aim when shaping these activities is that my students leave the class with a smile on their face, even after spending a whole session writing.

With this in mind I have created this activity, which can easily be adapted to any kind of essay, where students will need to follow several steps to create a final product: an article for the school newspaper.

Level: B2 and upward.
Aim: to collaboratively write an article in class.
Materials: the writing process handout, checklist, a model article, PDF of the activity
Time: 50 minutes
Note: this task is to be done after explaining the Writing Process, the parts of an essay and the tips to raise their essay score (handout above).Students will need to refer to this handout. Students will also have read a model article, which can be found in most textbooks.


INTRODUCTION. What’s an article?


An article is usually written for a magazine or newspaper. The main purpose is to engage the reader, so the opening paragraph should catch your reader’s interest. Attracting the reader’s attention can be done in a number of ways (refer to handout “The writing process “Part 2).

An article is usually factual and includes some comment, recommendation or opinion. It can be formal or informal depending on the target audience. Remind them, this is academic writing, so they cannot use contractions, abbreviations, or colloquial language.

An article consists of the following parts:
• Opening. It is the general presentation of the topic.

• Body (two or more paragraphs). The first paragraph should contain the strongest argument or example. The second paragraph the second strongest argument and the third the weakest.

A paragraph consists of several sentences about a certain topic. It has the following parts:
o A topic sentence, i.e. an idea.
o One or several supporting sentences to expand on the idea.
o A concluding sentence.

Conclusion. It is the paragraph that summarizes the main idea or presents a conclusion, depending on the kind of essay you need to write. Some things to bear in mind:

o It should not bring new ideas.
o It shouldn’t be very long.
o It can be similar to the opening, but presented in different words.

PROCEDURE


Step 1. Getting Started


• Ideally students work in groups of three. If necessary, ask them to work in pairs trying not to pair two weak students together.

• Suggest the following topics to write about and ask groups to choose one. Topics can be repeated.

1. Family reunions
2. Life lessons learned
3. Moving to another city


Step 2. Writing a Draft


Organisation:

1. Writing the Opening.

In this part, students introduce the subject.
The whole group works on the opening paragraph. Remind them of the three ways to catch the reader’s attention. Refer to Part 2 of “The Writing Process” handout.
Useful language:
Can you imagine…? Have you ever…? Would you like to…? Did you know that…?

2. Writing the Body

In this part, students give facts and details about the subject.
1. The whole group brainstorms for ideas. Refer back to handout the Writing Process to see how to do it effectively.

2. Students choose an idea to use in their paragraphs, and expand it, as explained in the Writing Process handout. One idea= one paragraph= one student. If you have a group of three students, they’ll need to write a body with three paragraphs. If there are only two students, two paragraphs.

3. Students, individually, write their paragraph developing their idea. Remind them to go from “general to specific”.


Step 3. Proofread your draft.


The whole group proofreads and improves their essays making sure the ideas flow naturally and the right connectors are used. Ask them to use the checklist provided.


Step 4. Writing the Conclusion


In this part, students sum up the main points and possibly give an opinion or recommendation.
1. The whole group works on the Concluding paragraph.
Useful language: In my opinion…, in conclusion…. As I see it…, Why not give t a chance..? Why not try it…?

2. The whole group proofreads the essay. Ask them to read it aloud, circling anything that needs to be improved, corrected or clarified. Does it sound “right”? Then, it’s ready.


Step 5. Writing your final essay.


Ask students to write their essays neatly on a clean sheet of paper (I used a different coloured paper for each group.) Display them on the walls of the class and ask students to stand up and read their partners’ articles.

And, of course, you’ll need to take them home to correct errors and offer advice.


On the other hand, I’ve been experimenting with Tackk, and embedded below is an example of some of the things you can do with this tool. But what I found more interesting, and will need to explore further, is the possibility of using this tool as a collaborative tool.  I’ll try to use it soon and tell you how it works.

Thanks for reading!

Blog de Cristina is also on Facebook. Join us!