It’s been raining for one week straight here in Asturias and it doesn’t seem to get any better next week. And while I don’t especially hate the rain, it’s beginning to get inconvenient. Lots of rain means floods and floods mean flooded roads and … well, I could go on and on but I don’t want you to picture me as an old fuddy-duddy.
But, I’m going to be frank and tell you that the more it rains, the less I go out. No worries. This just suits me fine right now, as I have had piles of written exams to mark and a bunch of workshops to prepare. I haven’t finished. It’s Sunday and I’m still working.
Anyway, work is never work when you are having fun and trying and testing new tools is fun for me.
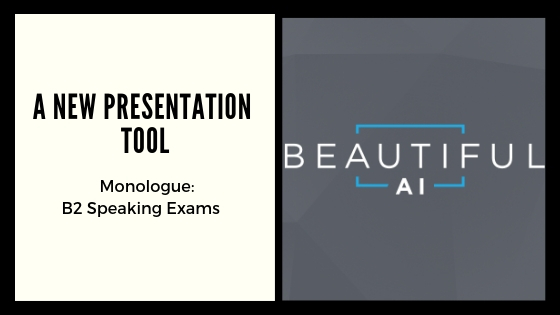
Today, I want to show a fantastic presentation tool Beautiful. Al with amazing templates which I have been using for some time now.
Things I like about this presentation tool:
- It is very visual and user-friendly
- It is free
- It has a large variety of ready-made very original templates to please everybody
- It has an image library, so it’s very easy to find the photos you need
- It is a collaborative tool. You can add collaborators to your presentation and give them permissions to edit the presentation or just view it.
- You can export it to PDF, PowerPoint or JPEG
The presentation you will find below is not a good example of all the possibilities this presentation tool offers, but this is the one I needed to do today. Two more presentations follow where you will be able to see more examples of the templates available,
![]()
![]()