Who doesn’t welcome a bit of fun in the classroom, a light getting-out-of-your-seat activity? I can see no raised hands? Right, we are all in for this game!!!
Before you continue reading. For this activity, you will need to have space in your classroom, which I don’t. Even though my class is U-shaped, it is still a small class. But, no problem. Right outside my class, there is a big aisle where we can do this little activity and perhaps, who knows, some students from other classes might want to join us. The more, the merrier.
We can do this game in two different ways or in both ways. Actually, I did first Part 1 and then Part 2. Both equally effective.
![]()
![]()
![]()
![]()
Before the game: on the board revise the grammar for I Wish/ If Only.
The Game:
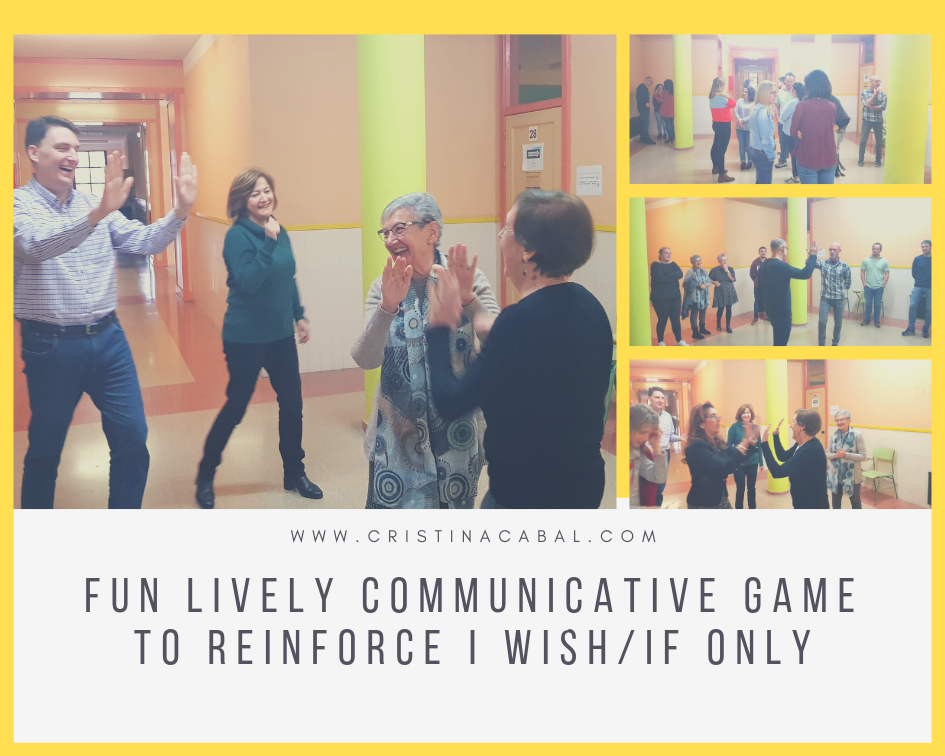
Ask students to form a big circle leaving the most space in the middle. They don’t have to hold hands or be excessively close to each other as long as they form a big circle and everybody can see everybody else.
This is how it works:
Part 1. The teacher asks a question containing I wish/ if only.
Shout the first question; for example, Who wishes they were rich? and instruct all the students whose answer is Yes to come into the middle of the circle and there, in pairs or threes, briefly explain their answers. Allow one or two minutes’ conversation and then, ask them to go back to their positions. Encourage them to use the target grammar in their answers.
What do students whose answer is No do? Easy answer: the same. The will need to pair up with the student who is closest to them explaining their answer.
These are the questions I have used. You are welcome to use them.
- Who wishes they were abroad right now?
- Who wishes they had a bigger car?
- Who wishes they had studied harder when they were at school?
- Who wishes they were thinner or fatter, taller or shorter?
- Who wishes their neighbours were nicer people?
- Who wishes they had a different English teacher? 😊
- Who wishes they had chosen a different profession?
- Who wishes they had a more positive attitude towards life?
- Who wishes they could live to be a hundred?
- Who wishes they could be president of their countries for just one day?
- Who wishes they had more time to socialize?
- Who wishes they had had more siblings?
- Who wishes they had been born in another century?
- Who wishes they had been born a member of the opposite sex?
Part 2. The students produce the sentences. The High-Five.
I have called this part The High Five. Still standing and forming a circle, ask students to think of a sentence about themselves they think people will easily relate to using I wish/ if only.
Students take it in turns to say their sentence aloud and at the same time move into the centre of the circle. Anybody who feels the same way moves to the centre of the circle and gives a High-five to the person in the centre of the circle who has said the sentence.
Same procedure as above. In pairs or in 3’s ask them to briefly discuss their answer.
You can start by moving to the centre of the circle and saying:
I wish I could pass my English test ( Note: your hands will hurt from all the high fives you’ll get with this sentence)
Discourage sentences that might be too personal or too specific like
I wish my mother had come with me on that trip.
Remember that it is important to model first and give clear instructions so that students know what they have to do. You want everybody participating and nobody slowing the game down or feeling uncomfortable because they haven’t understood what they need to do. If necessary, use concept check questions( CCQ) to make sure everybody knows what to do.
![]()
Interested in spicing up your lessons? I ran face-to-face workshops helping teachers integrate technology in their classes in an easy way, using free online digital tools. Practical tested ideas that combine traditional teaching with modern techniques. Fun and learning, a win-win!
From teacher to teacher. In English and in Spanish.