And I am back. Yeahhhh! Hopefully, I’ll have more time to write about all the activities that have worked wonders in my class. Hopefully.
But, before you continue I have an important announcement: I love retrieval practice activities! And this activity is all about pulling vocabulary out. Are you ready?


Whether you have just stumbled upon this blog or are a long-time visitor, you have to know that, first and foremost in my mind before I give my students a writing or speaking activity, is retrieval practice. We need to bring to the front of their minds the language we want them to use. If we don’t do it, what inevitably happens is that students will keep on using what they already feel comfortable using. And that won’t work. We are aiming at improving their level of English.
So, let me summarize this simple, highly-adaptable idea.
- Part 1: students, in groups, revise key vocabulary using cards that contain the definition for the target language.
- Part 2: students use these cards in a speaking activity.
NOTE: I am sharing with you the card template, but you can easily simplify the activity by just typing the definitions on a slip of paper. Me? I love visuals. I think they make a difference.
Now, that you are interested, let’s explain in detail:
PREPARATION
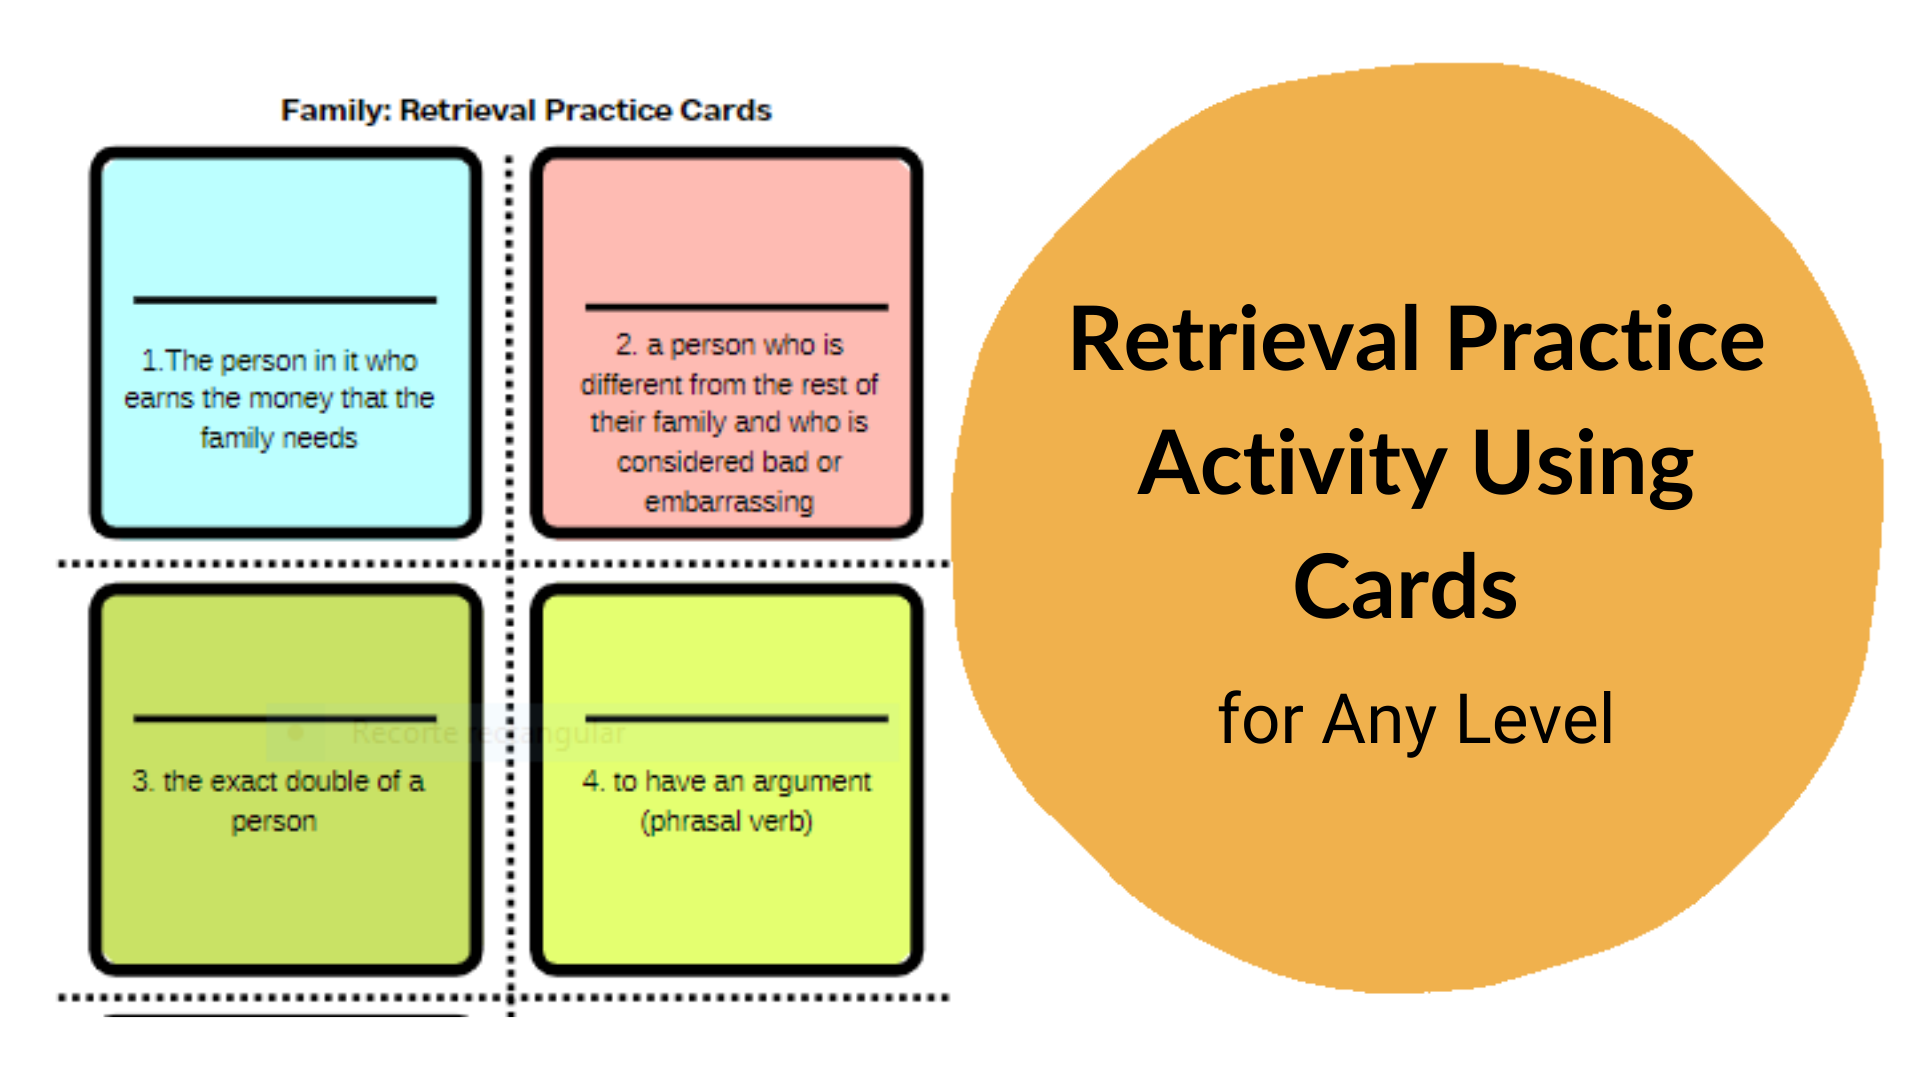
- Vocabulary. Choose some vocabulary you want your students to use and revise. It shouldn’t be new vocabulary. Remember, this is a retrieval practice activity. Type (if digital) or write the definition. Print and cut the cards. You will need a set of cards per group. As explained above, I love using visually appealing stuff, but you can easily simplify this part using scraps of paper.
- Conversation Questions. Prepare some conversation questions related to the topic.
Here’s the template in Canva I have used. You will need to create a free account to download it. And here’s my version of this beautiful template created by Görkem Arbak Bilek.
ACTIVITY 1. RETRIEVAL PRACTICE
STEP 1: Arrange students into groups of 3 and give each group a set of cards. Working together, they read the definition and try to come up with the word/expression that matches the definition. Ask them to use a pencil, as they might not get all the answers right.
STEP 2. Whole class. Check answers. Clarify. Work on pronunciation. You know the drill!
ACTIVITY 2. SPEAKING
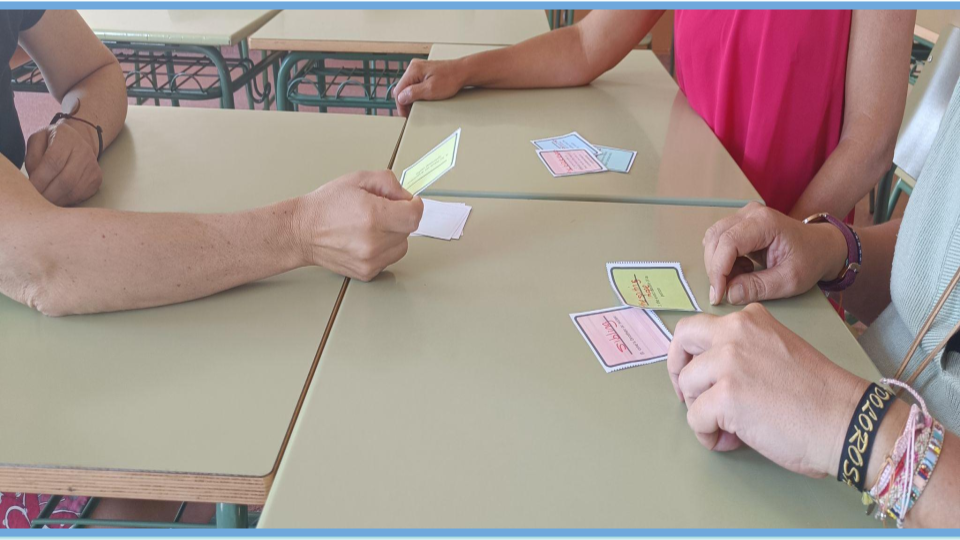
STEP 1: Students in the same groups. Ask students to put the cards in a pile face down on the table.
STEP 2: Tell students they are going to do some speaking practice and the first student to start speaking, for example, will be the youngest, and then, the activity will continue clockwise. Let’s call him Student A.
Ask the first question and Student A will pick up a card and show it to the other students in his/her group. Student A will have about 90 seconds to answer the question, trying to use the word/expression on the card. If he manages to use it, he can keep the card.; if not, it will be returned to the pile.
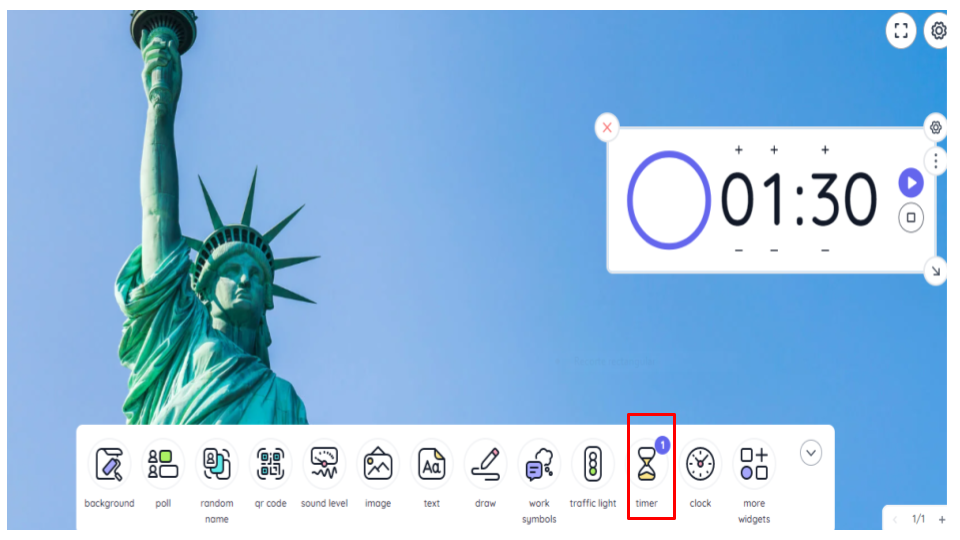
I forgot to mention you would need a timer. You can easily find one on Classroomscreen
Repeat procedure for Students B and C and repeat until all the cards have been used or you run out of questions.
How many cards? A multiple of three works well since we are working with groups of three students. Thus, 6, 9, or 12 will work fine. If you revise 12 words and only give them 6 questions, that should be fine too. They don’t have to use all of them. As an alternative, you can instruct students to choose two words rather than just one and keep the one(s) they have managed to use.
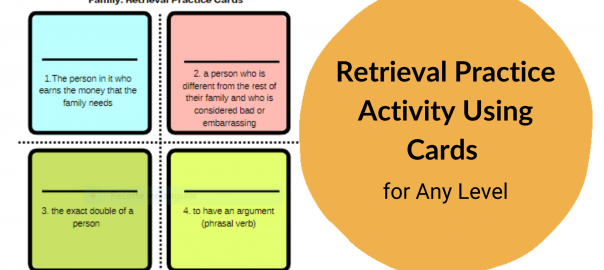
Note: I have used this activity in C1. The topic was Relationships and the answers are as follow:
1.the main breadwinner 2. black sheep 3. the spitting image 4. to fall out 5. to take after (phrasal verb) 6. to see eye to eye 7. to keep an eye on someone 8. sibling 9. to be under age 10. To come of age 11. to get on/along with somebody 12. to make up
AND AGAIN. Yes. Again
Whole class now.
- Gather all the cards and review the target vocabulary again while providing definitions.
- Give each student a card. Have them read the definition aloud and give this card to the first student who answers correctly and manages to give a sentence using the word/expression. I guess you know who the winner of this little game is. A round of applause for the winner is a good prize. We are poor teachers, here.
I hope you have liked this simple game. If you put it into practice, please let me know how it goes.