"I am not telling you it's going to be easy. I am telling you it's going to be worth it" Art Williams
I’m going to scream this from the rooftops. Social media is more than meets the eye.
I love the possibilities social media offers for both students and teachers alike. Today, I want to share with you a project I did with my B2 students using technology and my professional social media network. But, before we dive in, let me ramble for a little bit here.
Social media is more than meets the eye. True that most people use it just for fun, to catch up with friends old and new and read the occasional news, hardly ever bothering to check the source of the news, but there are also lots of people who are using social media for other purposes.
Right now, social media provides teachers with lots of opportunities to learn and see what other teachers are doing all around the world. Instantly. For free. You do not have to wait to read in a journal about the latest methodologies, about what teachers are doing on the other side of the world. You just follow people or communities, open your Facebook or your Twitter and there it is, opening doors and pulling down borders.
I grew up watching the news in black and white and using a landline phone to ask the operator to dial a number for me to be able to make a phone call so when in my 30’s there was talk of the possibility of making videoconferences, I thought it was science fiction. I couldn’t be more mistaken as we all know nowadays.
Today I would like to share with you a successful project I recently carried out with my B2 students using my professional social media and a free video/audio conference platform.
You are not one of my followers yet? Don’t worry! It is never too late!
![]()
Topic: education
Motivation:
- to offer my students the opportunity to interact with native speakers from different countries ( something that is not easy in the north of Spain)
- To ask them questions about their education system
- To offer my students the opportunity to do a meaningful activity using the vocabulary learned during the lesson.
- To make them realize they can understand and be understood by native speakers.
Tools:
- Twitter/Facebook
- Zoom
- Slips of paper
Project: to interact with British/American native speakers and ask them questions about their education system using Zoom, a reliable free video platform
Thanks to
My most heartfelt thanks to Tamara Parson, who is an English teacher living on the south coast of England; Trudi Rogers, also an English teacher living in France, and Hollin Wakefield, a French teacher form Berkeley (California) and creator of the awesome app Fluentkey. Thank you very much for your generosity and patience. I couldn’t have done it without you.
One week before the activity
- We worked with the topic of education and learned and practised vocabulary related to it.
- It was my first time using Zoom. I had to make sure I knew how to use it so I needed to persuade someone with enough computing skills to help me set a fake conference. (Thanks MªJosé)
- Using my professional social network Facebook and Twitter (bait, click to follow) I asked for collaboration of teachers from the UK and the USA.
The day before the activity
- I explained the activity and told my students we were going to have a video conference with experts on education from the UK and the USA. The conference was going to last about 30 minutes
- I asked my students to write interesting questions about things they wanted to know about the education system in the Uk and the USA. I instructed them to ask open questions.
This way we practised writing questions, which is something students always struggle with.
- Once they had their questions, I gave them a slip of paper and asked them to write their question there and at the back of it, their name.
- Using blue-tack, I displayed their questions on the walls of the class.
- I asked students to stand up and read all of them and then do a second reading choosing the ten questions they liked best. To indicate they liked a particular question, they just had to put a tick.
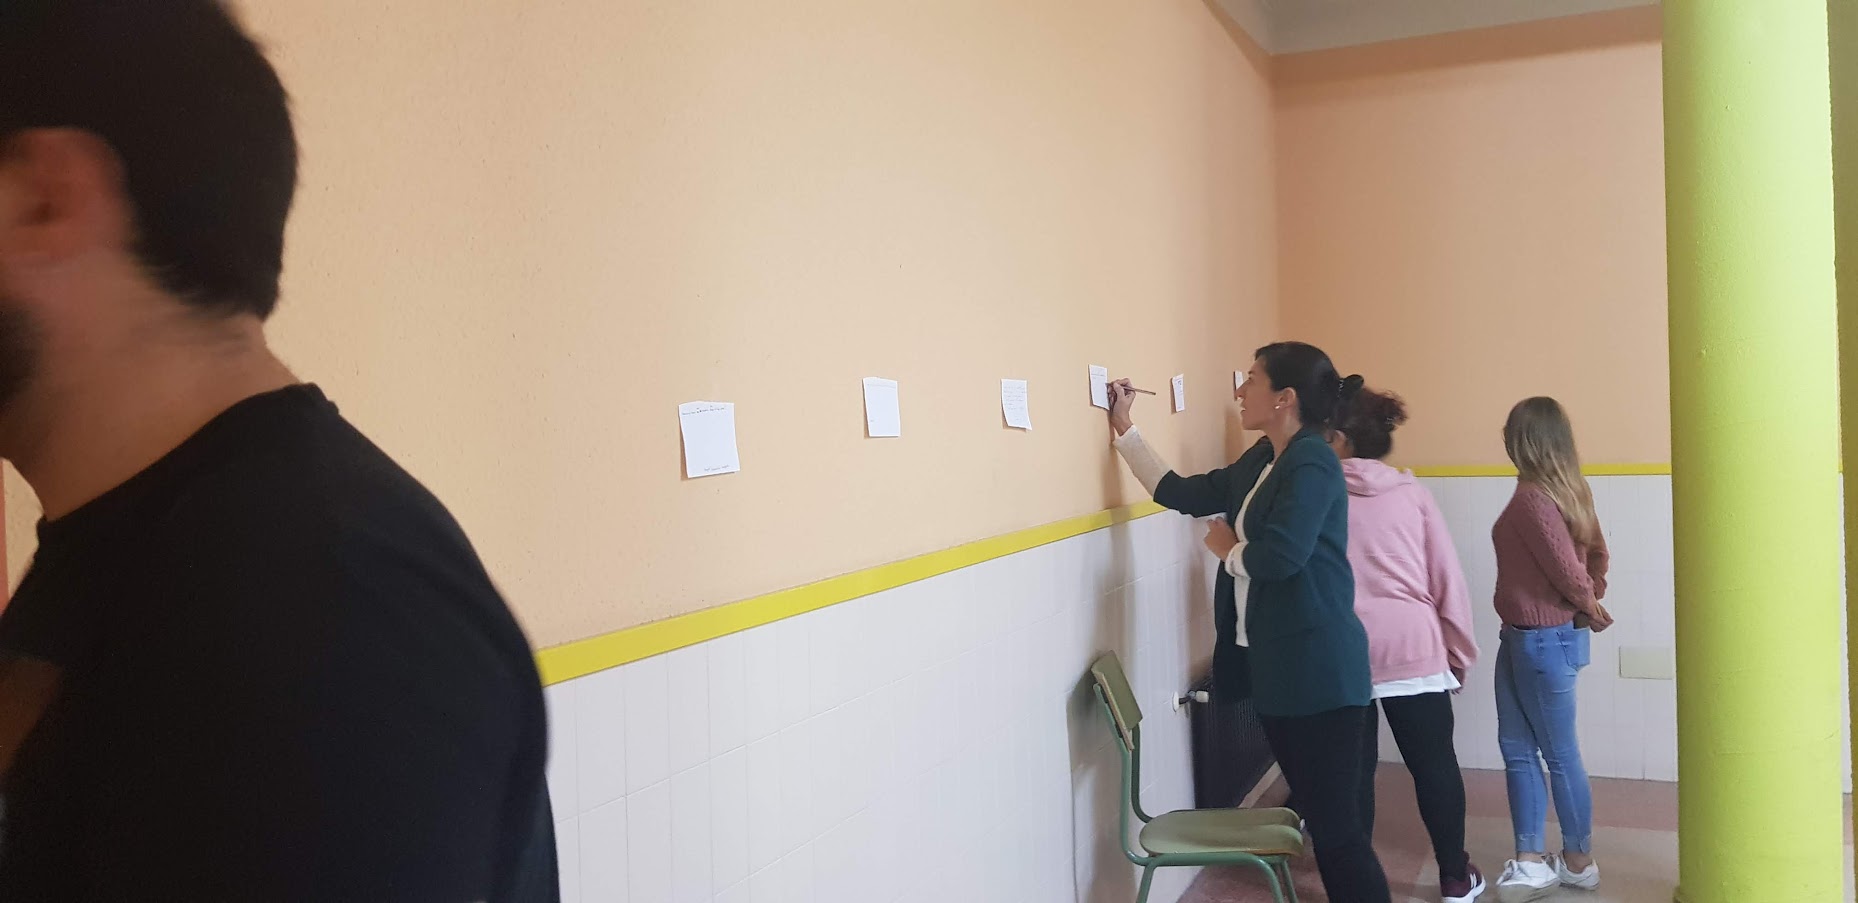
- I also read the questions, correcting grammar and spelling mistakes.
- The 10 questions which got more ticks were the ones students had to ask. However, if we had any spare time, any student could volunteer to ask any of their questions. In fact, in one of the groups, two or three extra questions were asked.
- I gave back each and every question to their owners and we worked on pronunciation.
- I told all my students to practise their questions at home as homework.
- I went home, set up the meeting on Zoom and emailed the collaborating teachers the invitation to the Zoom conference.
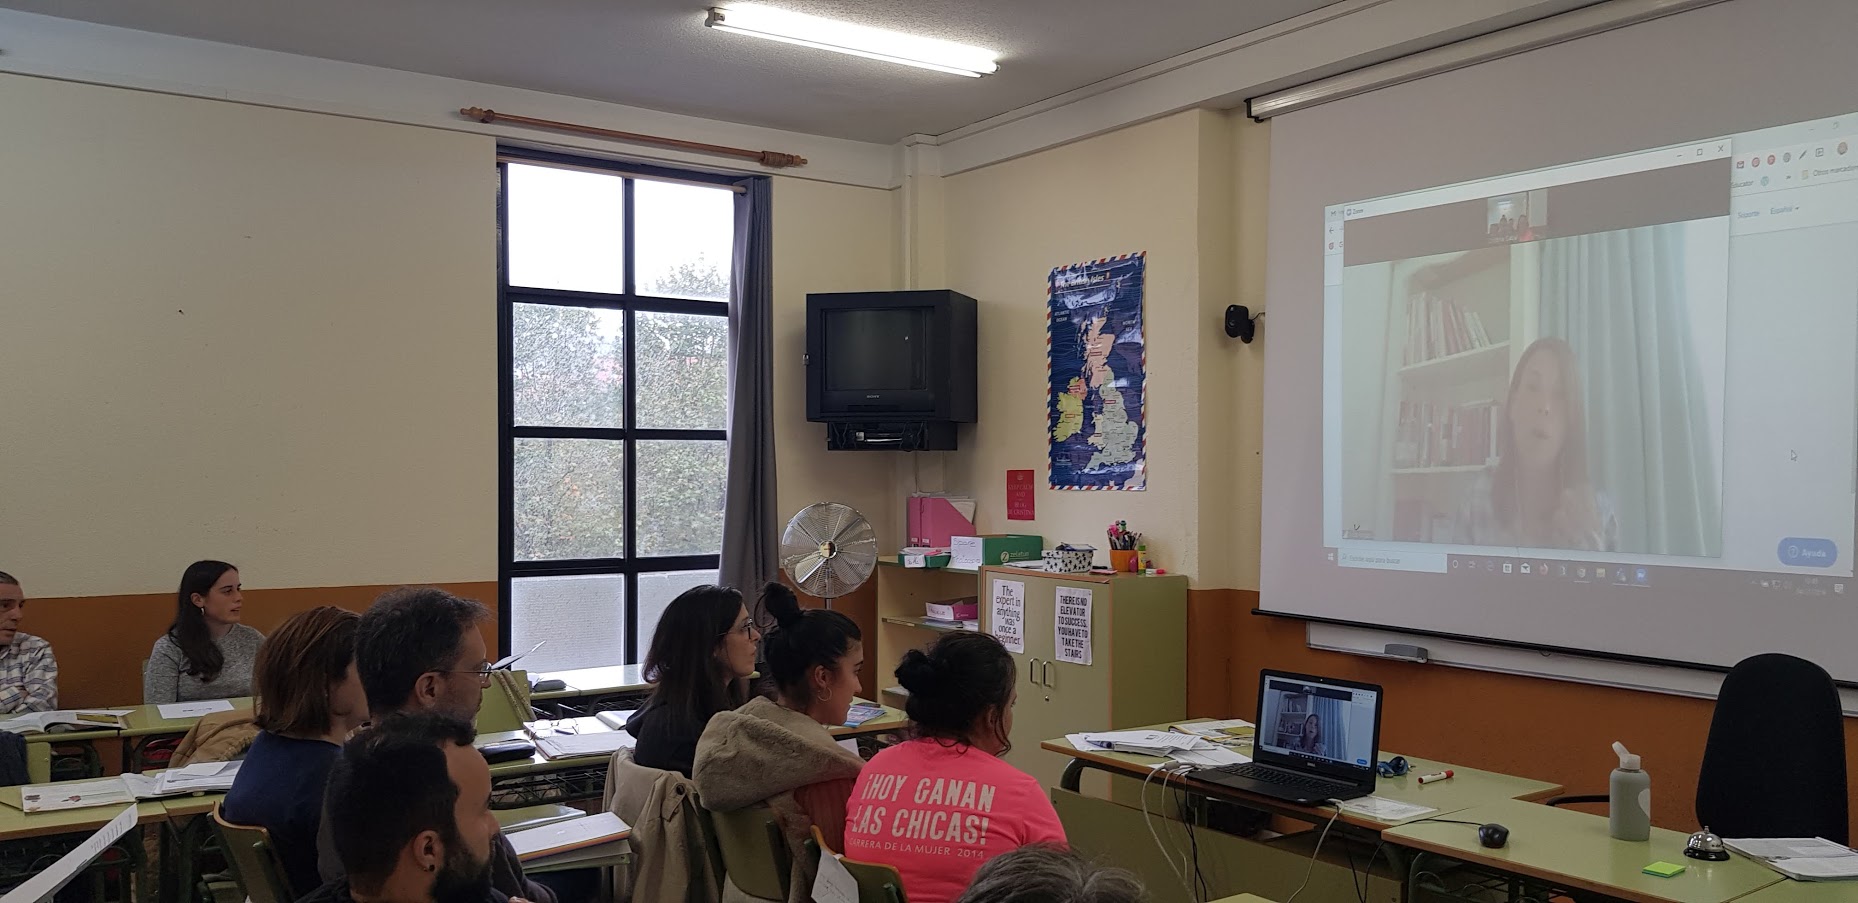
The day of the activity.
- We practised asking the questions again so that students felt more confident about their pronunciation.
- We moved chairs in front of the screen and at the appointed time, the videoconference began.
My personal experience
It is with immense satisfaction that I can say that it was a tremendous success. Trudi, Tamara and Hollin were just awesome and even though I had never seen them before and could have easily pulled back, they didn’t and they were really generous with their time.
From an academic point of view, my students were really motivated and it was really a boost to their confidence as not even once did they have to repeat their questions and they could easily follow the answers and sometimes lengthy explanations.
What is more, in the answers given by the native teachers, they could recognize most of the vocabulary they have worked with in class and this made studying this vocabulary more meaningful to them.
As for me, I was delighted. I am not going to say, it did not take time to set it up because I would be lying but it was really worthwhile.
Besides, the press caught wind of the activity and we made it to the local news as you can see in the photo below.
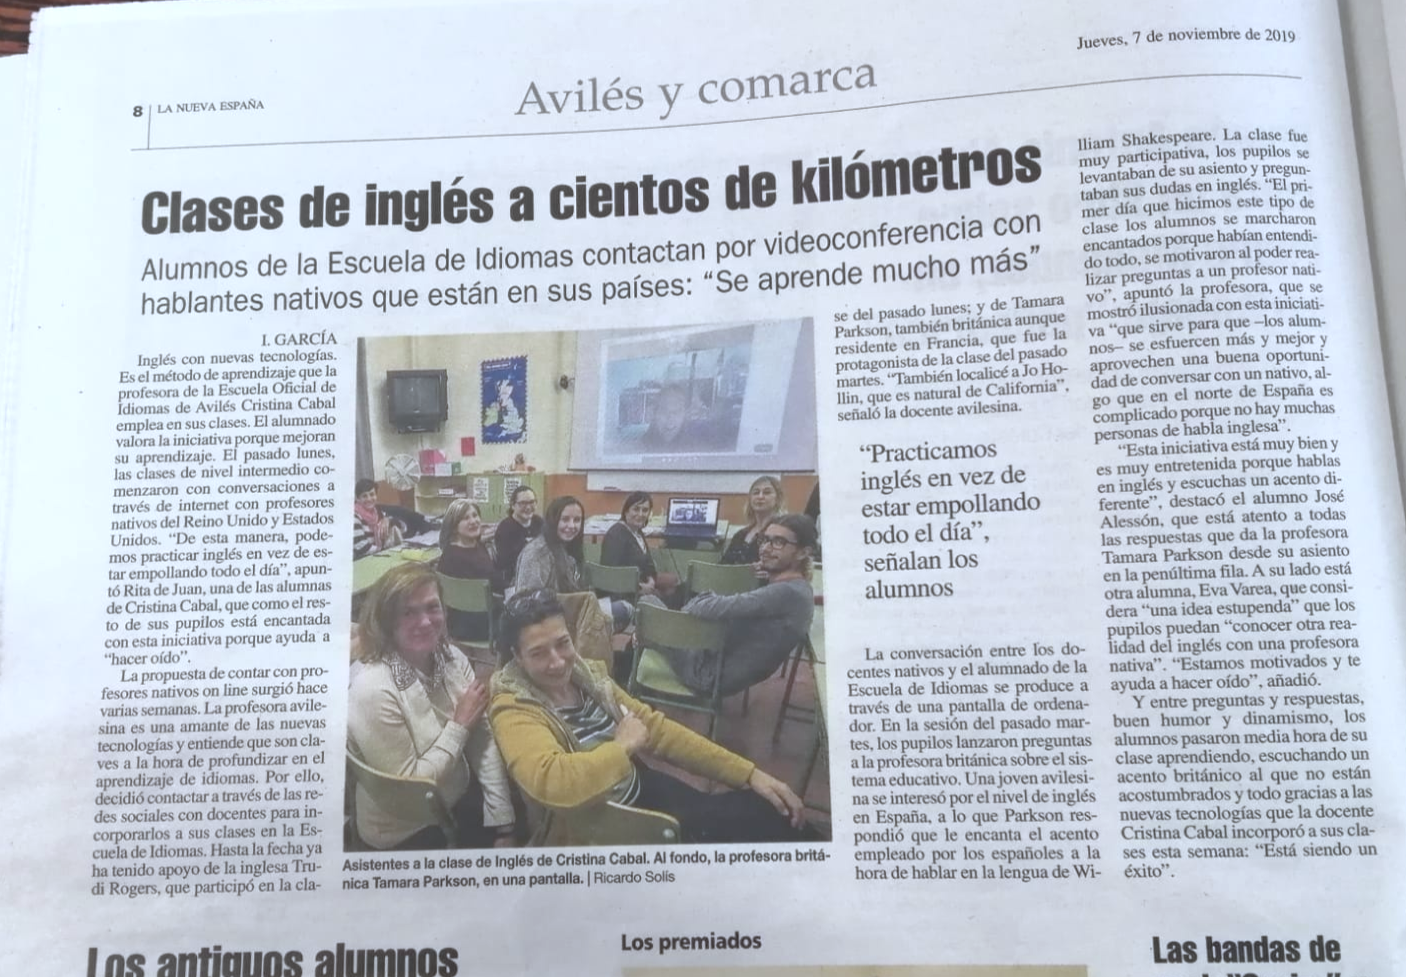
Thanks to Illán García from La Nueva España and to José Alesson for the photographs.
"I am not telling you it's going to be easy. I am telling you it's going to be worth it" Art Williams