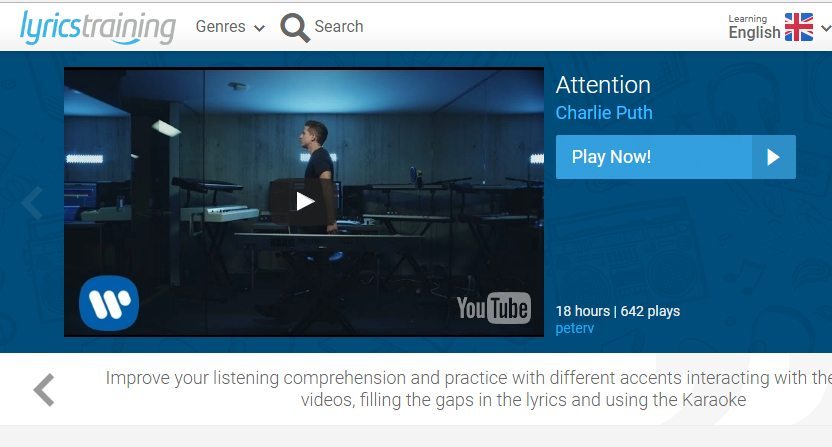
Do you check where coffee is produced before you buy it?
How do you decide which coffee to buy?
Do you know what fair trade is?
LISTENING COMPREHENSION
Watch this video to learn more about fair trade and answer the following questions
Preteach: Yield /jiːld/ the total amount of crops, profits, etc. that are produced
How does buying fair products help developing countries?
Coffee farmers earn very little money with the coffee they produce. Why is that? (3 reasons)
Fair Trade coffee makers are members of cooperatives. What are the advantages?
What is the most important thing about the fair trade system?
Fair Trade organizations also receive the fair trade premium. How can this money be used?
How does the environment benefit from fair trade?
How many fair trade products can be found in the market?
DISCUSSION QUESTIONS.
In pairs, discuss the following questions
Have you ever bought or tried a fair trade product?
Why do you think fair trade products are more expensive?
You always wear a brand of trainers, and one day you find out that they are made in factories where children work under very bad conditions. Honestly, would you continue buying this brand?
Do you think mass media and society influence consumerism, especially in teenagers?
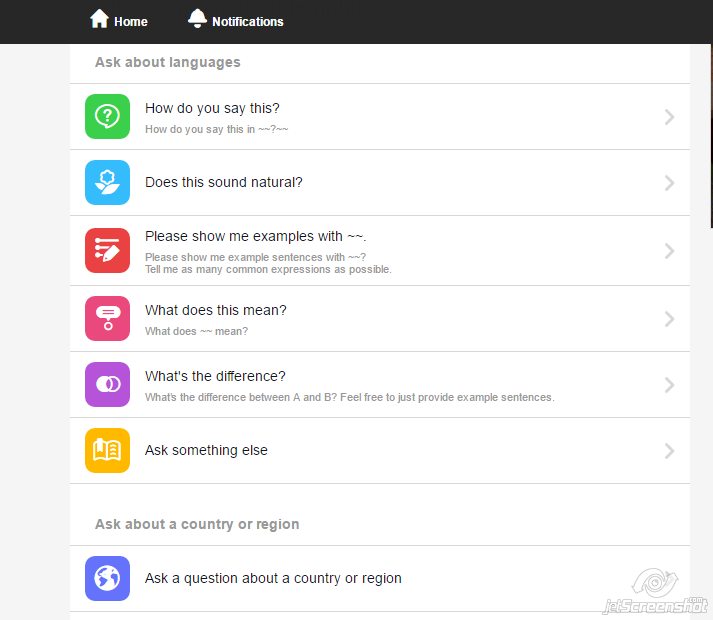
Wouldn’t it be just awesome to have native speakers almost at your beck and call to answer any of your questions and for free?
That’s HiNative, a free question/answer platform where you can ask questions and get answers about language and culture from native speakers all around the world.
I came across this extremely useful website by chance and decided to check it out. It was Saturday, 9.30 in the evening and thought it was probably not the best time to post a question and get an answer. I was wrong. Within 5 minutes of posting my question, I had 4 answers from native speakers so imagine how fast it would be any other day of the week. Hinative is a give-and-take platform and though you don’t necessarily have to do it, the thing is that I also liked the idea of helping others with questions about my own native language and so the site got me entertained for a long while.
You can also download their free app on your mobile phone.
How does it work?
Sign up. You’ll be sent an email to confirm your account.
The interface is very simple and easy to use.
Home: Here you can find questions other users ask about your own native language. Remember that it’s a give-and-take platform and you’re also expected to help other users
Notifications: this is where you’ll be notified about new answers to your questions.
Profile: Here you can modify your profile and your settings
Ask: where you can pose your questions. Below you’ll see some of the templates you can use to make it easier for you to ask.
3. Ask your question. What kind of questions can you ask?
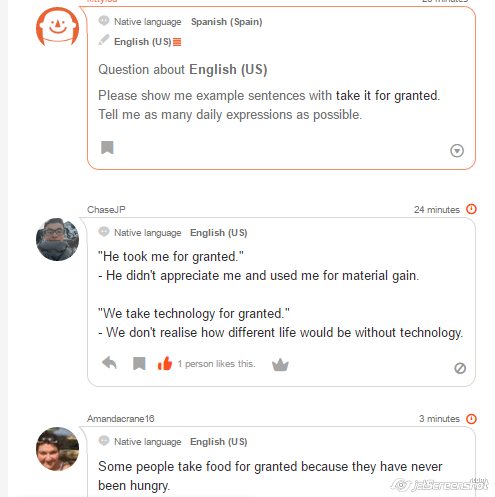
You can ask questions such as “what’s the difference between “scholarship” and “grant”? or How do you say “___” in English? or Please show me examples with the expression ” take it for granted”
So, I decided to use one of the templates and ask Please show me examples with the expression ” take it for granted”. This is what I got.
So, quite easy really, just register, ask your question and sit back while waiting for someone to get back to you. You won’t have to wait long.
So what do you do to practise listening for exams?
Growing up, I never had the opportunity to do any extra practice to improve my listening skills. We didn’t have the Internet and the thousand possibilities it offers to learners of any language nowadays. The teachers had an old tape player that sometimes stopped and started on its own and old tapes that ended up sounding distorted and most of the times unlistenable so if you wanted to get better at listening, you just listened to the radio and struggled to understand the lyrics and sing along. Not that I ever complained. That was the perfect excuse to listen to music while claiming to be working hard. I have to say that my father never bought it!
So, exams are just around the corner and I know you’re beginning to freak out. Don’t worry! Here I am, coming to the rescue!
These are, in my opinion, the best sites with quizzes to practise listening comprehension. In no particular order.
Levels: three main levels (beginner, intermediate and advanced)
Pre-listening /Post-listening activities: no
Transcript: yes
Audio Download: no
What I like best: it has some other listening activities like dictations or listening based on pictures for lower levels. It also has a section dedicated to advanced students with a story and some comprehension questions. See here
What I don’t like: In my opinion, the “listening” categorised under “advanced level” is far too easy.
What I like best: very user-friendly for both students and teachers. PDF available for exercises, answers and transcript.
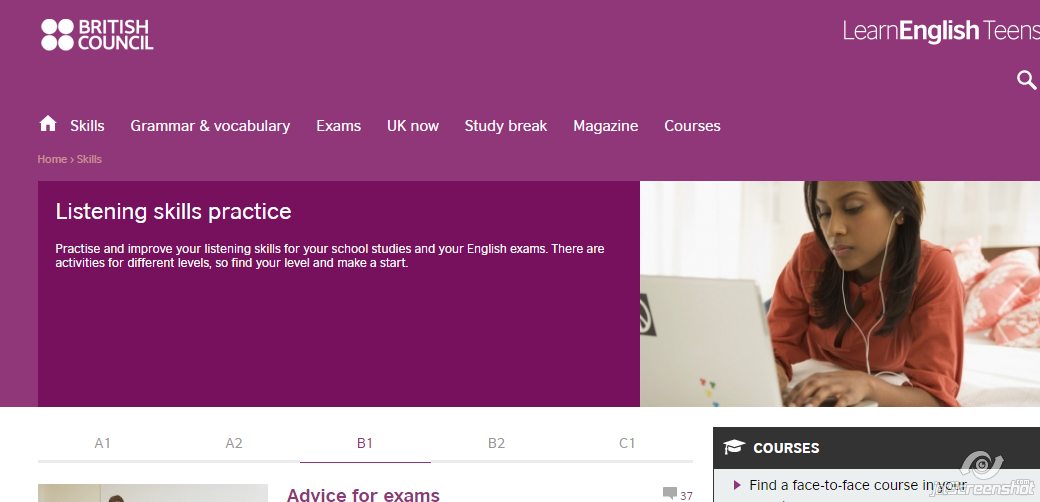
Extra: The British Council also runs some other sections to improve and practise your listening skills and learn about Britain, its culture, its language and its people. See here
Pre-listening /Post-listening activities: all the lessons have three parts : watch, think (where you can do the comprehension exercise) and discuss (post-listening questions)
Transcript: no, although most lessons are on youtube, and you can watch them with subtitles
Audio Download: the videos are on youtube, so they can be easily downloaded
What I don’t like: the audio is not sorted by level and although most of videos are for advanced students, some of them are much easier than others so I would say that they are suitable for B2 students and higher. You need to register although it’s free.
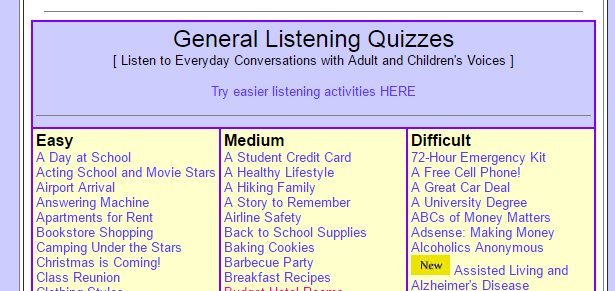
Levels: three levels ( easy, medium and difficult)
Pre-listening /Post-listening activities: Both
Transcript: yes
Audio Download: No
What I like best: the post-listening activities and the vocabulary section ( see here) where you can learn how to pronounce words associated to different topics.
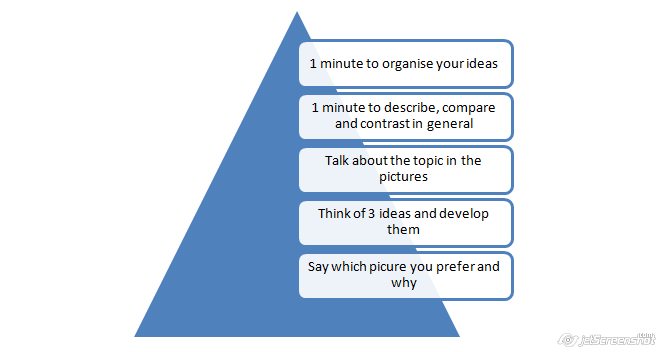
In the intermediate and more advanced exam you will be presented with one, two or more pictures about the same topic but in clear contrast. It’s important to remember that you are not supposed to give a detailed description of everything that is happening in the picture(s). On the contrary, what is important is that you talk about the topic or idea suggested in the picture(s). If you are given for example 3 minutes to talk, use just one minute of this time to describe in general, using appropriate language and structures; the rest of the time should be dedicated to talking about the topic and giving your opinion.
BEFORE THE EXAM
Make a list of the most common topics asked in the exam.
Brainstorm vocabulary you can use related to this topic. Mind mapping works perfect here. I use the free site Goconqr.
Practise using sets of pictures in contrast. You can use my own selection here. (Scroll down)
If your problem is that you never know what to say, I suggest you have a look at some conversation questions you might be asked about the given topic. It will probably help you get started. Have a look at some common topics with questions here.
Time yourself to control the time it takes you to develop your ideas.
Record yourself and then listen to the recording and see how you can improve it. You can use the app Soundcloud, which allows you to stop the recording and write comments.
(You can write a comment on a track through the text box below the waveform that says ‘Write a comment…’ and press your return or enter key to send. The comment will appear at the point on the waveform where you first started typing. Alternatively, you can click any free space in the comment section to leave a comment at that specific point)
The day before the exam, revise all the topics and the vocabulary you can use.
Half an hour before the exam, don’t speak your mother tongue. Spend the time listening, doing some silent reading or pronunciation exercises in English.
DURING THE EXAM
Before you start speaking:
If you are allowed 1 minute to organise your ideas, use that minute. I have often seen candidates not taking this minute and making a mess of the exam just because they didn’t take the time to organise their ideas.
Scan the pictures and identify the topic. Sometimes there is a title or a heading that helps you.
Try to come up with three ideas about the topic suggested by the pictures. Expand on these ideas.
Taking the exam:
Begin by giving an overall idea of what the pictures are about, using a variety of structures, modals to indicate possibility and the useful “look” or “seem”.
Talk about the topic. It’s easier if you relate it to yourself, but if you don’t have this experience, talk about a friend’s or just lie. This is an English exam, not a lie detector.
Develop your ideas. Try to use linkers to connect your ideas.
Don’t give too complicated explanations. I’m sorry to say, you’ll probably make mistakes.
Give your opinion. Say which one you prefer and why.
Some expressions you can use:
Remember it’s better if you start by giving a general idea of what the pictures are about. Don’t start like this:
In the first picture I can see
Start like this:
In this worksheet there are two photos. They both show different ways of (shopping).
These photos are clearly both connected to the topic of (science)… but in two quite different contexts. In the first one… In contrast, the second picture shows…
The photo/picture shows …
The first thing that strikes me about this picture is…
Remember that you are describing a picture, so you cannot be 100% sure of what is happening. Use language that suggests this:
I think…
Maybe / Perhaps…
I guess they are…
Modal verbs of deduction: she must / can’t /
Modal verbs of possibility: could, may, might
She looks/seems… (tired)/ She looks like … (a teacher). It looks/seems as if (it’s raining)
Every child is an artist, the problem is staying an artist when you grow up.” – Pablo Picasso
I had a full-blown, real, very much needed holiday. The last two months had been unbelievably hectic: end-of-term exams, working full-time during the week and some teacher training weekends and, to top it all, I was also writing a project to apply for a European grant, which unfortunately I won’t get.
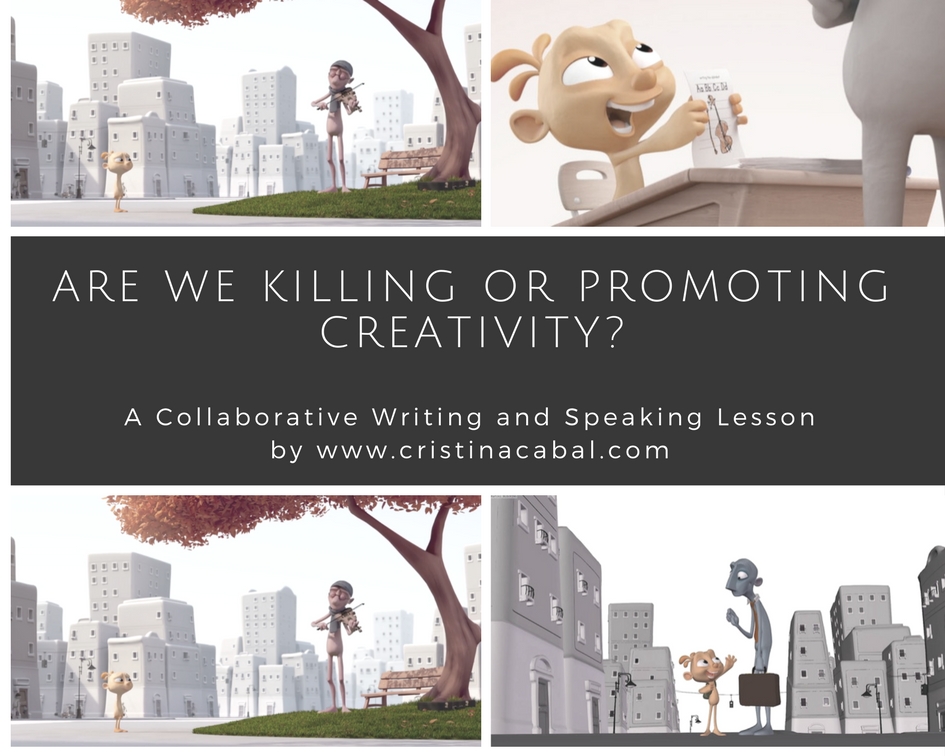
So, there I was, fully enjoying my break , when I stumbled upon an article in El Pais about a short animated short film “Alike”, which had won a Goya award in 2016, and I was struck with how beautiful, touching and thought-provoking the video was. And I just knew I had to show it to my students, do something with it and well, here it is. I hope you enjoy it as much as I did.
About the lesson: In this lesson, aimed at B2 students and above, students watch a short silent film called Alike (7 minutes) with two main aims:
To give voice to the story and for this:
they will have to collaboratively write the story
they will have to collaboratively retell the story
2. To discuss some questions related to education, the promotion of creativity and daring to be different.
Step 1. Warm-up: Copi and Paste
Tell students they are going to watch a short video called Alike, where the main two characters are a father and a son whose names are Copi and Paste. Focus on the names, write them on the board and ask students to predict what the story could be about. Hopefully, students will come up with some of these ideas
(Lack of)Creativity
Imagination
Routine
Lack of ideas
Plagiarism
Inspiration
Deception
Step 2. Introducing the video and the task
Explain that the video they are about to see is an animated short film (7 minutes) called “Alike” where there is no dialogue. However, the video is so touching and thought-provoking that words are not necessary; images and especially colours play an essential role and are enough to tell this beautiful story and to give us something to think about.
Play the video once asking students to focus on how the colours (or lack of colour) help tell the story. You can also tell them that, later in the lesson, they will need to narrate the story so they need to concentrate on everything that happens.
1. Form groups and assign each group a part of the story. The aim is first to write and then to tell their part of the story as it happens, but also to analyse the hidden meaning and the values it tries to highlight.
The day begins (0:06- 1:32)
At school/ at work ( 1:33-2:38)
Leaving the office/school (2:39-3:07)
The next days (3:08-3:52)
Copi’s surrender (3:53-5:00)
But one day (5:01-6:50)
Depending on the number of students, you can ask them to work in pairs or assign each group two parts.
2. Play the story once again for the students to take down notes and get stsrted with the writing task. Walk around offering help and guidance.
3. Play the story again to help students polish their part.
4. Ask each group to name a spokesperson and ask these students to come to the front of the class and give voice to the story as you play it once again. Be ready to pause the video as required.