How to Use your Phone as a Remote for Google Slides

Wouldn’t you like to be the cool teacher using your mobile as a remote to present your own slides? This is soooo easy that I don’t know why I haven’t tried it before.

Before acting cool, you will need to download two things. Don’t worry. They are free. I am the free app teacher, remember? Oh and… please bear in mind it’s only useful if you use Google Slides. I do. All the time.

  1. In your laptop: Download the Chrome Extension “Remote for Slides” here. Make sure you click Add to Chrome.
  2. In your mobile, download the free app Remote for slides.

Done? Now

  • Open your presentation on Google Slides
  • Click on the Present w/Remote

3. At the bottom, you will see Start Remote

  • Click and your Slide ID will be displayed. It will be on display for only 2 seconds. If you want to see it again, you will have to click the Show It icon next to it.
  • Open the first slide on Presentation mode
  • Done? Open the app on your mobile, enter the code and click on Connect
  • That’s it”! You will see two buttons. Next Slide and Previous Slide

See? Easy peasy! I told you so!

Quiz: Most Common Pronunciation Mistakes Heard in Class and How to Use this Quiz

I’m not going to lie to you and tell you this is one of those quick posts that you can throw together on a whim because it’s not. It has taken some time to gather all the data needed to create this quiz. Jotting down common mispronunciations is not something you do in a day. You need to be a patient person. You need to listen, correct the mistake and write it down again and again. And only when you see the mistake is repeated consistently, you decide it’s a common pronunciation mistake.

With all the papers that clutter my desk while teaching, it has also helped tremendously to have a large post-it note on my desk where I could easily and quickly store all these mistakes I have been hearing repeatedly in class.

HOW TO USE THIS QUIZ IN CLASS: GAME

I could easily tell my students to do this quiz at home as homework and I will probably do it. Too. However, so much time and effort have been used in creating this quiz that I cannot just give it to them and hope they do it. Some students might do it but… all of them?  I am not that naive. I need to make sure they all correct these common mispronunciations. I don’t want to hear them ever again.

Procedure:

Why a game and not just the quiz? because I firmly believe students learn better if they are engaged and having fun.  I also believe in reinforcing and consolidation. So after the first game-like quiz, there is always a follow-up of some kind.

  • Ideally, students will work in pairs.
  • Give each student a card with A written on one side and B written on the other side. For practical purposes, you can give them an index card or a scrap of paper and ask them to write a big A on one side and a big B on the other side.
  • Tell students they are going to do a pronunciation quiz containing some common pronunciation mistakes.  Each slide will feature a commonly mispronounced word and two possible answers. The first answer in the quiz will be considered ” A ” and the second answer will be “B”.
  • Tell students they will need to silently read the question and decide on the correct answer. Tell them that on the count of three, they will need to show their partner their option: A or B. Emphasize that they should both show their answer at the same time.
  • Choose the correct answer on the displayed quiz and drill pronunciation. Students keep score of the points they get. One point for each correct answer.

Follow -up:

  1. At the end of the class, do the exercise again. This time, students will work in pairs again but on the count of three, they will need to tell each other the correct answer.
  2. The next day, write some of the words on the board and check they know how to pronounce them.

And here’s the quiz. Please, notice that correct answers reflect standard British and American pronunciations backed up by  MacMillan and  Cambridge online dictionaries.

Up to a little challenge?

By the way, some years ago (October 2015)I created this other award-winning quiz on Most Common Pronunciation Mistakes Heard in Oral Exams. Just saying! 🙂

Lesson Plan: Work

After a little bit of a crazy few months, we are finally heading for final exams. More craziness. I know. But, of a different kind.

My first time on Twitter was in December 2015. I was kind of “forced” to open a Twitter account as I was doing an online talk for the British Council on “How to Keep students Motivated” and the app we were using for the event required that I had a Twitter handle.  I didn’t know much about Twitter and even thought, in my ignorance,  it was something bound to disappear but I couldn’t be more mistaken. I love Twitter and have to say  I am kind of hooked on it.  What? You are not following me?  Hey! You’re missing out! This is my twitter handle @blogdecristina.   I hope to meet you all there.

Anyway, I got the idea for the first exercise in this lesson plan from Twitter.  Twitter users were tweeting about “five jobs I have had” and I was like “hmm, that’s a good idea to start a lesson about work!” and without further ado, I set out to write this post about work. Hope you find it useful.

Step 1. Writing and Speaking.Three Jobs I have Had.  

Telling an anecdote about yourself never fails to engage students. It’s only fair that if you are asking them to talk about themselves, you do the same.  On the board, write the following:

Before working as a teacher,

  • I worked as a waitress
  • I worked on a farm picking apples
  • I worked as a baby sitter

Briefly, explain your experiences working in the jobs you have chosen to share with them and then ask them to do the same. Once they have written their sentences, ask them to work in groups of 3 sharing their experiences in these jobs. They are gonna love this exercise!

Step 2. Writing. Choose a Job Game. Working with adjectives
  • Write on the board or give students a hand-out with adjectives used to describe positive character traits for the workplace. Check that they know the meanings.
ambitious confident conscientious easy-going hard-working
honest loyal methodical motivated reliable
punctual responsible dynamic cheerful charming
communicative flexible sociable creative resourceful
  • Display the collage below and ask students to identify the jobs in the collage.

  • Individually and without telling anybody, students choose one of the jobs in the collage and write three clues for the rest of the class/group to guess the job.
  • The first clue needs to necessarily include three character traits associated with the job. This clue is worth 3 points.
  • The second clue needs to be associated with either the workplace or the people you work with if you are doing this job. This clue is worth 2 points.
  • The third clue needs to be associated with something you are required to do in this job. This clue is worth 1 point.
  • Once they all have their clues, ask students to form groups of 4. Taking it in turns, they read Clue 1. If someone guesses the job after reading clue 1, they score 3 points; if clue number 2 has to be read, they will score 2 points …etc.
  • Rules: if a student in the group has a wrong guess for a job, he won’t be allowed to guess again for this job. This will prevent students from giving wild guesses.

Example:

  • In this job, you have to be hard-working, cheerful dynamic and sociable.
  • In this job, you have to work with young and old people
  • In this job, you have to take orders

Answer: waiter

Step 3: Introducing/Revising & Consolidating Vocabulary related to Work


Every time I revise or introduce vocabulary in my classes, I make a point of reminding my students that they need to study the vocabulary in chunks. There is no point in studying the verb “apply” if they don’t know the preposition it collocates with.  The next activity is a good one to remind students of this necessity.


  • Give students two minutes to write all the vocabulary they know related to work, excluding professions.
  • On the board, write a circle with the word Work inside. Do a mind-map with all the vocabulary students provide.
  • Drill pronunciation and then do a quick translation exercise to consolidate meaning and pronunciation.
  • Introduce new vocabulary.

I find it really important to tap into students’ prior knowledge, especially when teaching vocabulary. If they feel they know most of the words, they won’t feel overwhelmed and will be able to maintain a positive attitude.

PDF Vocabulary 

Step 4.Speaking. Playing Cards. A game to activate vocabulary

Aim: to activate vocabulary in a speaking activity

Give each student 10 pieces of paper, more or less the size of a card in a deck of cards. Ask them to write down vocabulary they can remember related to work. Encourage them to write chunks, for ex. “apply for” or “quit a job”.  They should write each chunk on a different piece of paper. Encourage legible clear handwriting. Once this is done:

  1. Ask students to form groups of three
  2. Ask them to place their cards face down on the table. They might want to shuffle them a bit. Each student is dealt two cards.
  3. Display the first question from the presentation below and ask students to discuss it trying to use the words in their cards. As soon as they use the chunk in a card, they discard it and take a new one, they should always have two cards in their hands.
  4. Allow 4 minutes per question and then display a new question for the students to discuss.
  5. Students continue in the same way using vocabulary, discarding and taking new cards until there are none left in the pile. At this point, they will count the number of cards they have managed to use. Each card is worth 1 point. Very quickly they decide who the winner is and shuffling the cards the game starts all over again until all the questions have been answered or you deem appropriate.

Work

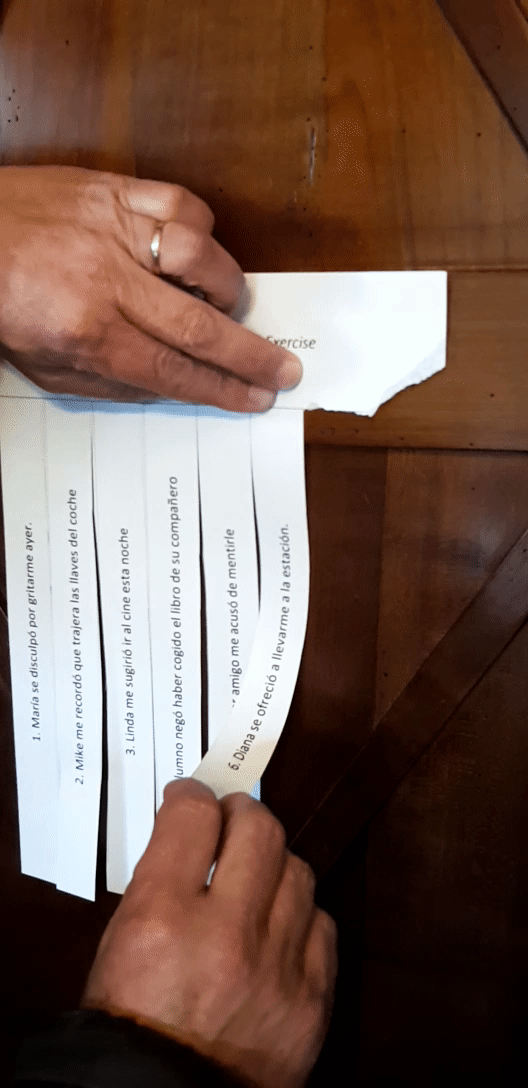
Step 5. Oral and written Mediation

Yes. Mediation.  I know some of you hate it, and some of you don’t even know what it is. Mediation and I, I think we have clicked, and as  I am afraid it is here to stay, emotional intelligence should apply here if we want to keep the good vibes coming. I have decided to be smart and embrace mediation.

Below, you’ll find two examples of oral interlinguistic, also called cross-linguistic,  mediation and an example of written interlinguistic mediation

Interested in spicing up your lessons? I ran face-to-face workshops helping teachers integrate technology in their classes in an easy way, using free online digital tools. Practical tested ideas that combine traditional teaching with modern techniques. Fun and learning, a win-win!

From teacher to teacher. In English and in Spanish.

Using Grass Skirts to Revise Topics

This is a very quick post to share with you an idea I had this very same morning to “ask” my students to start revising for oral exams.

Where I teach, the B2 level is divided into two courses: B2.1 and B2.2. To be perfectly honest, sometimes I wish there was a B2.3 course. I always feel like I need more time to prepare them to take the dreaded standardized exams they need to sit at the end of each level.

Anyway, the idea is to politely “force” my students to start revising the topics and obviously the specific topic-related vocabulary studied in B2.1. However, some of my students are really hard-working and they have already started revising on their own. For this reason, I don’t want to schedule the revision, I want them to choose the topics they really need to revise. Worried about the best way to do it, I came up with this idea. I haven’t tested it yet, but I hope it is effective.

TEARABLE TOPICS

First Day. Preparation:

  • Choose a number of topics and write them down. You can use my own template. See it here.   You can make your own template o download the one Tekhnologic  very kindly offers on his website. I have used his.
  • Cut a line between words but don’t cut them all the way so that the slip of paper doesn’t detach.
  • Each poster contains 8 topics. If you have between 10 and 18 students, you will need two copies of the poster. I printed them in different colours for easy differentiation.
  • Put the poster(s) on the walls of the class.
  • Divide the class into two groups and assign a poster to each group.
  • Tell students they will have to choose the topic they would like to revise and tear off the piece of paper containing the topic they have chosen. They can only do it from their assigned poster.
  • Homework: tell students that they will need to prepare a speech of about 3 minutes about something related to their topic. Some ideas are suggested in the poster together with more detailed instructions.

 Day 2.Procedure.

  • Students within their groups form groups of 3 and give their speeches.
  • Encourage members of the group to ask follow-up questions once the student has finished.
  • Repeat procedure to continue revising: display new posters (with the same topics) on the walls of the class and again ask students to choose a new topic to be revised. Again, ask them to prepare a short speech for the next day and repeat procedure.

Click to get the editable document

A Speaking Activity: Just a Minute Musical Chairs

Do you want enthusiastic students? Then, be enthusiastic yourself!

It is just amazing where you can get inspiration for your next class activity. Inspiration is capricious and might strike you while showering, running or watching YouTube videos.

To be perfectly honest, I do most of my thinking while I am driving to work. That’s probably the only time when I am not multitasking and can concentrate on only one thing: driving. And that is a far cry from the morning madness of preparing classes while at the same time thinking about the need to check the stew- that is almost always eaten with a lingering burning taste- or the shopping I need to do or the laundry I need to wash. While driving, I just drive. And think.

So, this activity sprang to mind while I was driving. As it is always the same road and I go on auto-pilot ( I am sure some of you can relate), I remembered a video I saw on Twitter of a workshop in an EOI in Madrid where teachers were playing what I think was, musical chairs. And it got me thinking.

Could I try it with my students? I teach adults and some of them are on the wrong side of 70. Will it work? It worked!

Before the game starts
  • Arrange the chairs in a circle. There should be one chair less than the number of students.
  • Write cards with some topics to write about. Alternatively, you can give each student a card and ask them to write a conversation question.
  • Without telling students, divide the class into two teams and write down on a piece of paper the members of each team. Don’t tell students which team they belong to. This will ensure that they won’t play tricks and save seats for a member of their team.
  • You’ll need some music. I have used my mobile phone to play”La Isla Bonita”

This game needs some rearranging of the class furniture. You will need to push the tables to the walls and form a big circle with the chairs. As my class is smallish, I use the hall just outside my class for this kind of activities. If the weather is nice, you can also take your students outside. I am sure they will be delighted.

Procedure
  1. Arrange the chairs in a circle. If you have 15 students, there should be 14 chairs.
  2. Tell students you have secretly formed two teams but they will not know the members of their team until the end of the game.
  3. You will need music and a timer.

Two options to play this game

Option 1.

  1. Ask students to stand inside the circle. Tell them that you’ll play some music and they will need to walk close to the chairs forming a circle.  When the music stops they should try to sit down on any available chair. As there is one chair less, one student will remain standing.
  2. Offer the student left standing the set of cards with the topic to talk about face down and ask him to choose one card.
  3. He will have to speak about the topic for 1 minute but if he pauses or hesitates, he will lose 1 point for his team. If he accomplishes the task, he will score 1 point for his team. You’ll have to keep track of the points awarded or taken off as until the end of the game no one knows which team they belong to.
  4. Repeat procedure as many times as you like. I have done it 6 times.

Option 2.

Everything is more or less the same but there is no music in this option.

1.The student standing in the middle need to say something along the lines of…

  • Move if you have a brother or a sister
  • Move if you have ever failed an exam
  • Move if you have ever lied to a friend

2. Again, the students left standing will choose a card and talk about the topic for one minute. The rules for Option 1 apply in Option 2.

Who wins?

Keep track of the number of points each team gets. The team with the most points at the end of the game wins! Reveal the names of the students in each team, add up the points and announce the winner.

What is my role as a teacher?

I am afraid I cannot just enjoy the game. I am teaching here and they are learning. So, while the student is making the speech, I am jotting down pronunciation slips and important grammar mistakes. When the exercise is finished, on the board I give them feedback as a whole class.

It is very easy for the teacher to overlook this part but for me, it’s essential my students understand that playing a game in class is only another way to learn.

Just remember, if you want enthusiastic students, be enthusiastic yourself! There is no other way!