Believe me, they don’t have to be boring. In fact, just the opposite.
I know some teachers consider translation activities a thing of the past and that, arguably, they should be banned from our classes. I don’t completely agree.
If I am honest with you, I can’t say that I like giving students a whole paragraph to translate, but a one-sentence translation exercise can help consolidate and reinforce grammar and vocabulary.
And it doesn’t need to be boring. In fact, it can be a lot of fun. How?
Easy. Let’s combine a seemingly boring traditional exercise with an online fun tool and let’s turn it into a competition.
Preparation:
• Decide on few sentences you want students to translate. I’d suggest 6-8 sentences. If you like exploring tools, my favourite for this kind of activities is Playbuzz flip cards.
• Slips of paper
How to go about it:
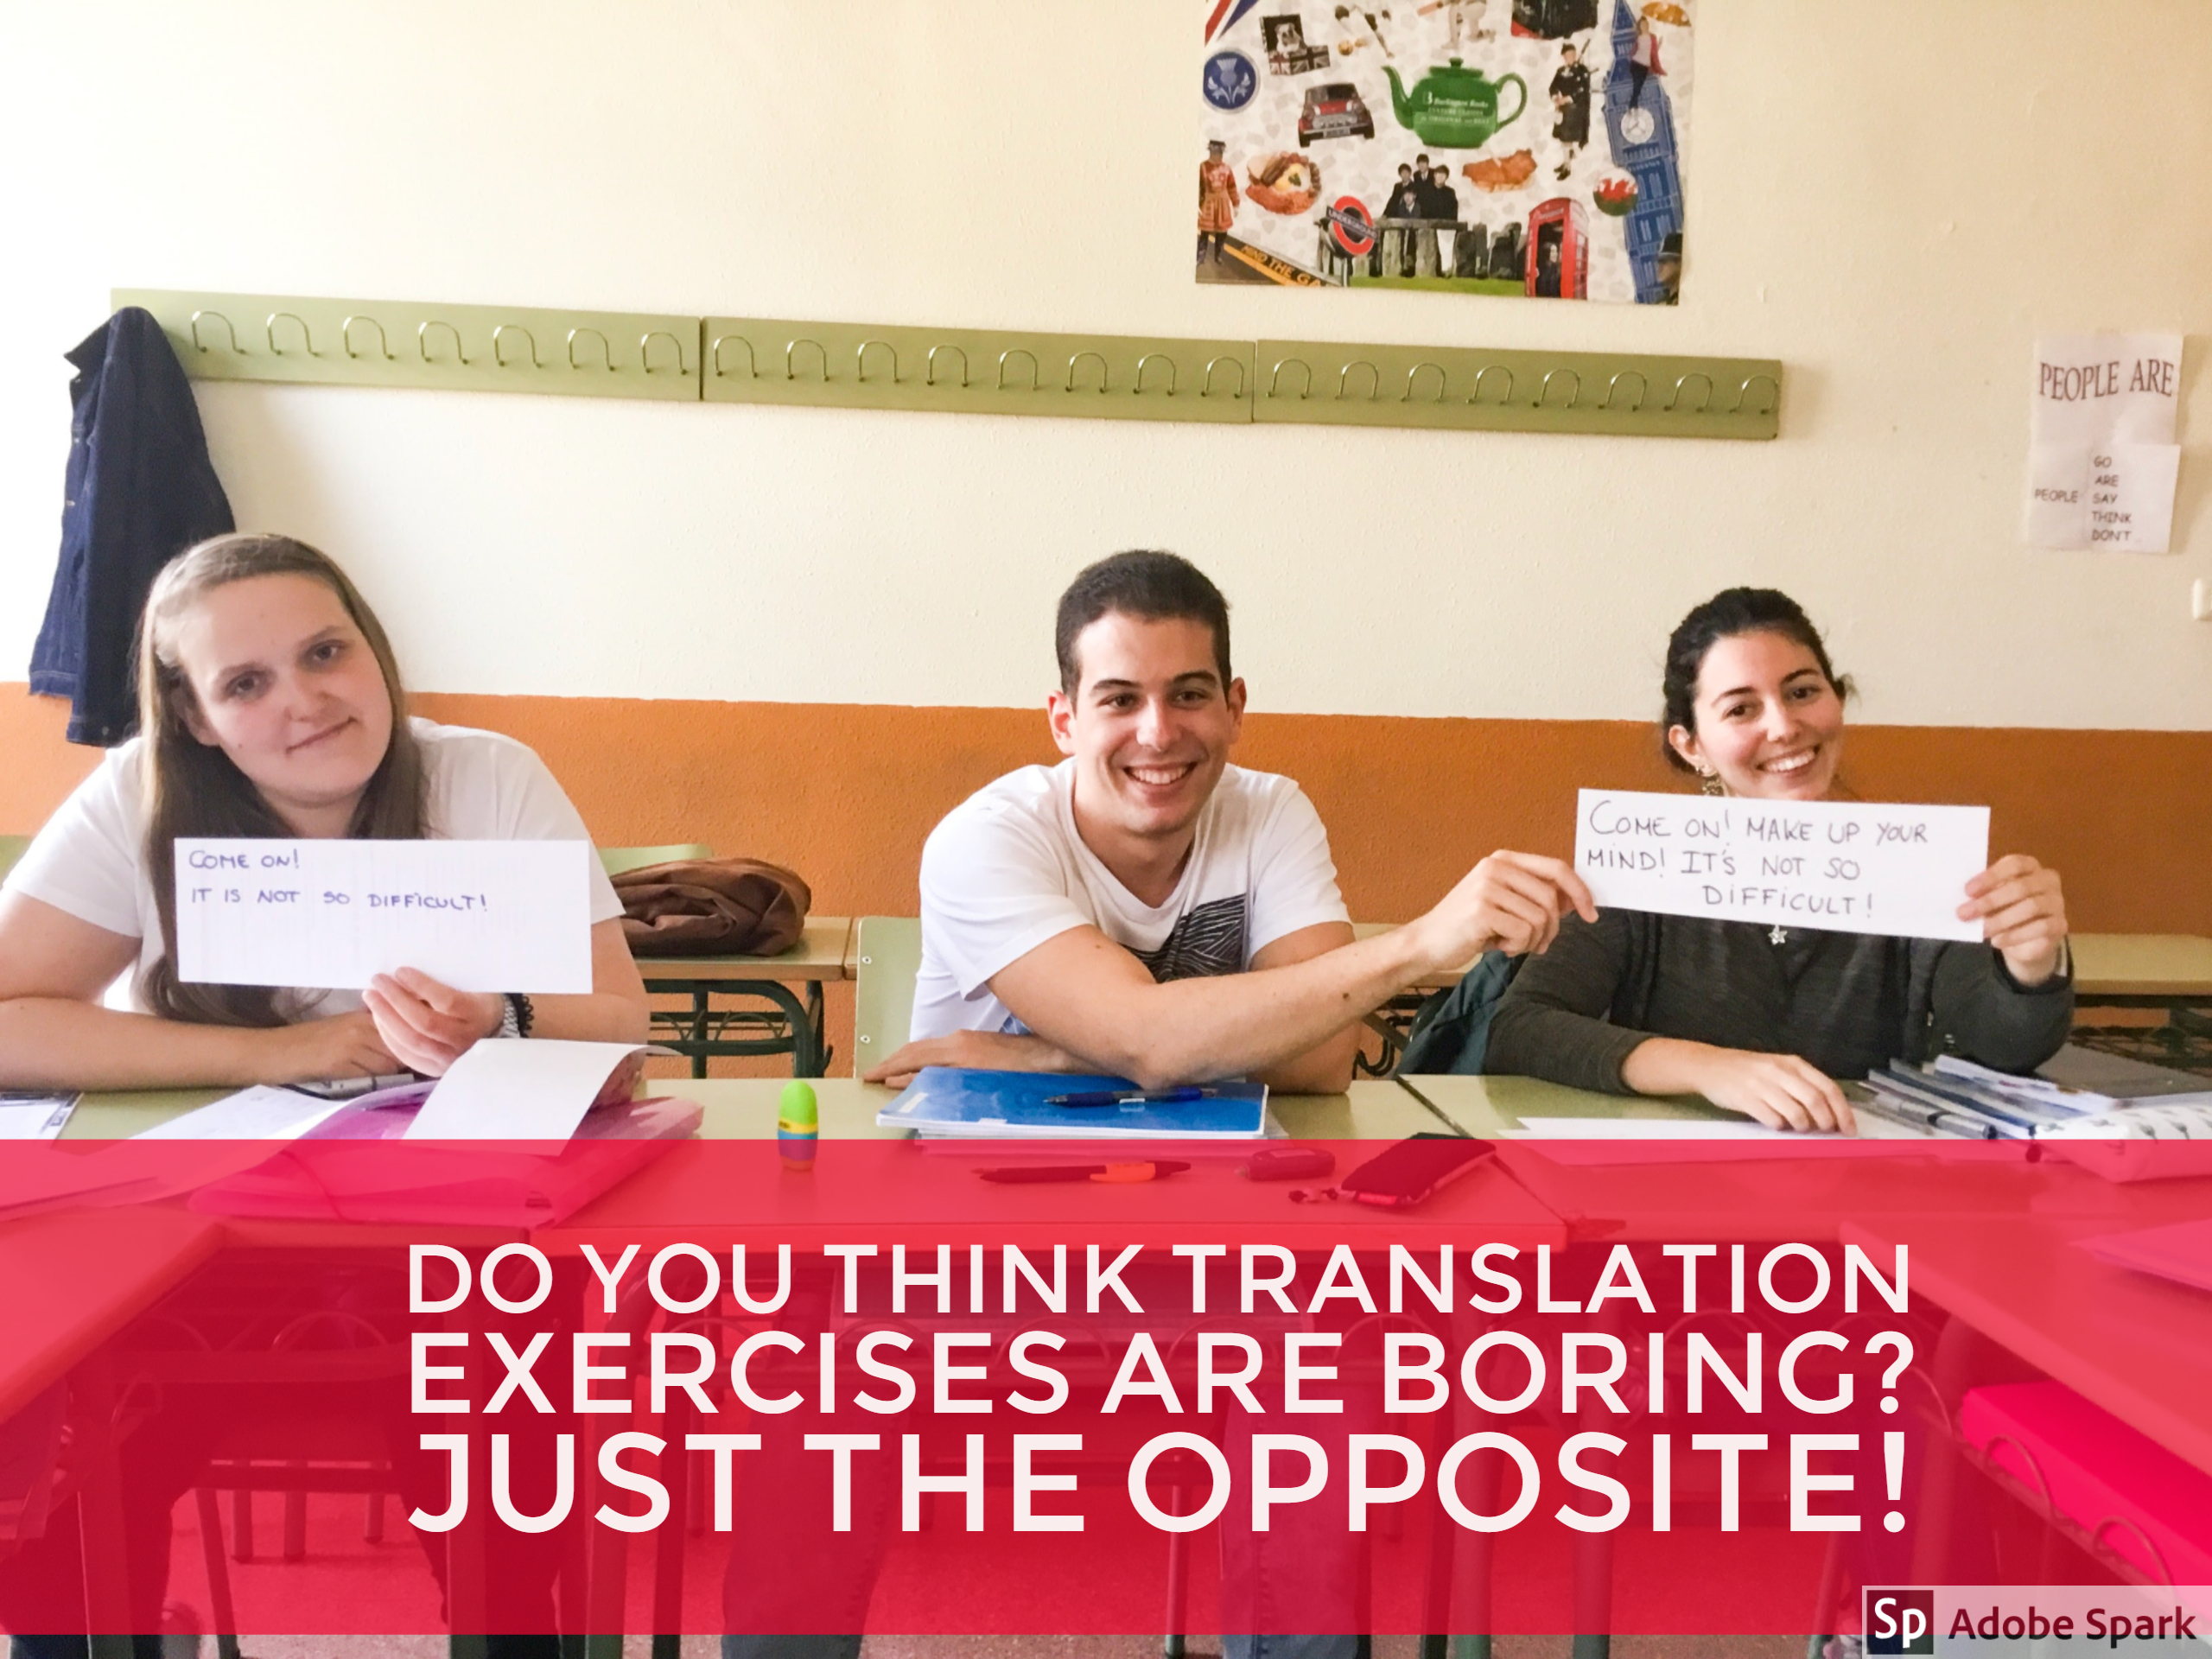
1. Pair learners and give them as many slips of paper as sentences you want them to translate.
2. Write the first sentence on the board and ask students to translate into English. If you use the online tool I mentioned above, just show the first card. (See mine below)
3. Depending on the length or difficulty of the sentence to be translated, set a time limit.
4. Once the pair have their sentence, ask them to write it on the slip of paper big enough for you to see from a distance.
5. When the time is up, ask the pair to hold it up and quickly go through all the translated sentences awarding 1 point to the pair who has the correct translation.
6. The winner is the pair who get the most points.
Note: Be strict with spelling mistakes or any other tiny mistakes. Students love it when you are strict and don’t give away the points easily.
Follow-up: Revise again all the sentences, but this time orally.